> For the complete documentation index, see [llms.txt](https://docs.nexthink.com/platform/llms.txt). Markdown versions of documentation pages are available by appending `.md` to page URLs; this page is available as [Markdown](https://docs.nexthink.com/platform/ja/solutions/automating-major-incident-management.md).

# 大規模インシデント管理の自動化

## 問題点

優先度1（P1）および優先度2（P2）のチケットに対する重大インシデントの管理では、迅速なコミュニケーション、根本原因の割り当て、チーム間での一貫した更新が求められます。 これらのタスクを手動で処理すると、遅延やエラーが発生し、ServiceNow などの IT サービス管理（ITSM）プラットフォームでの解決が遅くなります。 その結果、ダウンタイムが長引き、生産性が低下します。

## ソリューション

Nexthink は、ServiceNow などの ITSM ソリューションと統合することで、P1 および P2 チケットの重大インシデント管理（MIM）を自動化します。 統合は次の二つの部分で構成されます：

1. ServiceNow Flow Designer で構築する **ServiceNow ワークフロー**。チケットを作成し、MIM チームメンバーのデバイスを取得し、Nexthink Query Language（NQL）API を介して Nexthink にクエリを実行します。
2. ServiceNow ワークフローから Nexthink Workflows API を通じてトリガーされる **Nexthink ワークフロー**。MIM チームメンバーに通知する Nexthink キャンペーンを送信し、回答を収集して、ServiceNow API を呼び出しチケットを解決担当チームに移動します。

{% hint style="info" %}
この統合により、重大インシデント発生時の手作業が削減され、チーム間の連携が向上します。 このガイドでは ServiceNow を例として使用していますが、同じパターンを適用して他の ITSM ツールと統合できます。
{% endhint %}

## 前提条件

重大インシデント管理のために ServiceNow を Nexthink と統合する前に、次の要件を満たしていることを確認してください：

* Flow を含む Nexthink ライセンス — ステップ5「[#trigger-the-nexthink-mim-workflow](#trigger-the-nexthink-mim-workflow "mention")」で説明するように、Workflows API を介して Nexthink ワークフローをトリガーするために必要です。
* Nexthink と統合された ServiceNow。
* Nexthink インスタンスで作成した Nexthink API 認証情報（クライアント ID とクライアントシークレット）— 詳細については、[API credentials](https://docs.nexthink.com/api) を参照してください。
* ServiceNow と Nexthink の両方での管理者権限。

## 統合フロー

この統合では、MIM 通知プロセスの最初の部分を自動化し、P1 または P2 チケットを即座に認識して根本原因の特定に向けて連携できるようにします。

{% stepper %}
{% step %}

### チケットを作成する

P1 または P2 チケットを作成するには：

1. ServiceNow で、**Flow Designer** に移動します。
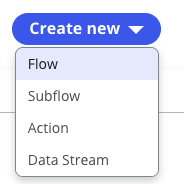
2. **Create new** をクリックし、**Flow** を選択します。

<div align="left"><figure><img src="/files/M49f1n0Zyldyw9mGmFKQ" alt="" width="138"><figcaption></figcaption></figure></div>

3. **Flow properties** で該当するプロパティを入力し、**Submit** をクリックします。
4. ServiceNow Flow Designer でワークフローのトリガーを定義します。

<div align="left"><figure><img src="/files/C4UaYTX87XXCOsdRkueP" alt=""><figcaption></figcaption></figure></div>
{% endstep %}

{% step %}

### MIM グループメンバーとデバイスを取得する

P1 または P2 チケットが作成されると、ServiceNow ワークフローは Lightweight Directory Access Protocol（LDAP）同期を通じて Active Directory（AD）から MIM グループメンバーを取得し、Configuration Management Database（CMDB）で割り当てられたデバイスを確認して、必要なリソースを収集します。

MIM グループのメンバーを取得するには:

1. ServiceNow で、**Flow Designer** に移動します。
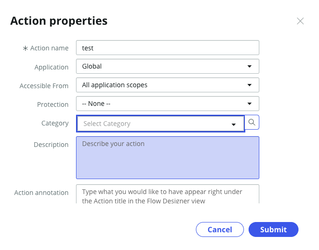
2. **Create new** をクリックし、**Action** を選択します。

<div align="left"><figure><img src="/files/sBTEccrn1ZKTdCut4e6K" alt="" width="173"><figcaption></figcaption></figure></div>

3. **Action properties** で該当するプロパティを入力し、**Submit** をクリックします。
4. **+** をクリックして、グループのユーザーとそのデバイスを取得するスクリプトを追加します。

<div align="left"><figure><img src="/files/YUH3uehhLi8mphgurc1o" alt=""><figcaption></figcaption></figure></div>

**スクリプト例**:

```javascript
(function execute(inputs, outputs) {
   var deviceList = [];
   var j=0;
   for (i=0; i<8; i++){
		deviceList[i] = "empty"
	}
	// Get the users from the group
	var gr = new GlideRecord('sys_user_grmember');
	gr.addEncodedQuery('group=4dcd9658870c465029c687f60cbb356e');
	gr.query();
	while(gr.next()) {
		// Get the computers from the users
		var gr2 = new GlideRecord('cmdb_ci_computer');
		gr2.addQuery('assigned_to',gr.user);
		gr2.addQuery("u_testing_usage","false");
		gr2.addActiveQuery();
		gr2.query();
		while(gr2.next())
		{
			deviceList[j]= gr2.name;
			j++;
		}        
	}			
	// Get the specified count and time frame in seconds
	var specifiedCount = 2;
	var timeFrameSeconds = 120;

	// Get the current date and time in UTC format
	var now = new GlideDateTime();

	// Create a new GlideDateTime for the time frame limit (120 seconds ago)
	var timeFrameLimit = new GlideDateTime();
	timeFrameLimit.addSeconds(-timeFrameSeconds);

	// Query for P1 and P2 incidents created within the time frame
	var incidentGr = new GlideRecord('incident');
	var q1 = incidentGr.addQuery('sys_created_on', '>=', timeFrameLimit);
	var q2 = incidentGr.addQuery('priority',1);
	q2.addOrCondition('priority',2);
	incidentGr.query();

	// Save the devices as the first output
	outputs.device...
```

{% hint style="info" %}
上記のスクリプトは、ユーザーの `devices` リストを配列に保存します。 この配列はスクリプトの「出力変数」セクションで出力として設定されます。 さらに、インシデントの `sys_id` が別の出力として保存されます。
{% endhint %}
{% endstep %}

{% step %}

### API 認証トークンを生成する

Nexthink との API トランザクションに必要なトークンを取得するには、ServiceNow ワークフローに以下のフィールドを含む REST ステップを作成します：

* **接続**: 直接接続を定義します。
* **Base URL**: `https://<instancename>.api.<region>.nexthink.cloud`
* **リソースパス**： `/oauth2/default/v1/token`
* **HTTPメソッド**: POST
* **ヘッダー**:
  * **Authorization**: Basic \<Base64 エンコードされた clientId:clientSecret>。 この値を取得するには、クライアント ID とクライアントシークレットを Base64 形式でエンコードします。
* 右上隅のアイコンをクリックして、フィールドを保存します。
  {% endstep %}

{% step %}

### デバイス情報を Nexthink API に送信する

ServiceNow ワークフローは CMDB からデバイス名を取得して Nexthink API に送信します。Nexthink API は、それらのデバイスに関連付けられた Collector ID を返します。 その後、ServiceNow はこの情報を使用してチケットを更新します。

ServiceNow ワークフローに、以下のフィールドを含むもう一つの REST ステップを作成します：

* **接続**: 直接接続を定義します。
* **Base URL**: `https://<instancename>.api.<region>.nexthink.cloud`
* **リソースパス**: `/api/v2/nql/execute`
* **HTTP メソッド**: POST
* **ヘッダー**:
  * **受け入れ**: application/json,text/csv
  * **Authorization**: Data Picker を使用します。フィールドの横にあるアイコンをクリックし、**2 - Rest Step > Response Body** を選択します。 **Fx** アイコンを使用して、次のフィルターを適用します：
    1. 区切り文字を `"access_token":` に指定した **String > Split**
    2. **ユーティリティ > 配列から最後のアイテムを取得**
    3. 区切り文字を `,"scope"` に指定した **String > Split**
    4. **ユーティリティ > 配列から最初の項目を取得**
  * **コンテンツタイプ**: application/json
* **リクエストコンテンツ**: Nexthink API クエリの実行に必要な本文コンテンツ（たとえば NQL クエリ）を追加します。

**リクエストボディの例**:

```json
{
"queryId": "<#yourqueryId>",
"parameters":{
"device0": "(here use the data picker to select 1 - Script Step > devices and apply the filter Get Item from Array with the value 0)",
"device1": "(here use the data picker to select 1 - Script Step > devices and apply the filter Get Item from Array with the value 1)",
"device2": "(here use the data picker to select 1 - Script Step > devices and apply the filter Get Item from Array with the value 2)",
"device3": "(here use the data picker to select 1 - Script Step > devices and apply the filter Get Item from Array with the value 3)",
"device4": "(here use the data picker to select 1 - Script Step > devices and apply the filter Get Item from Array with the value 4)",
"device5": "(here use the data picker to select 1 - Script Step > devices and apply the filter Get Item from Array with the value 5)",
"device6": "(here use the data picker to select 1 - Script Step > devices and apply the filter Get Item from Array with the value 6)",
"device7": "(here use the data picker to select 1 - Script Step > devices and apply the filter Get Item from Array with the value 7)",
}
```

NexthinkでデバイスのCollector UID一覧を取得するためのNQL APIクエリを実行します。 以下のNQLクエリコードを使用します：

```
devices during past 7d
| where device.name in [$device0,$device1,$device2,$device3,$device4,$device5,$device6,$device7]
| list collector.uid
```

{% endstep %}

{% step %}

### Nexthink MIM ワークフローをトリガーする

ServiceNow がトリガーする前に、MIM キャンペーンを送信して ServiceNow にコールバックする Nexthink ワークフローがすでに存在し、API 呼び出し用に有効化されている必要があります。

**Nexthink での操作:**

1. 次の **Workflow details:** を含むアクティブな Nexthink ワークフローがあることを確認します。
   * 一意の `workflowId` を自動的に取得するためのワークフロー名 — この ID を以下のリクエスト本文で使用します。
   * ワークフローを API 呼び出しで利用可能にするため、**API** チェックボックスをオンにします。
2. ワークフロー ロジック内の **Campaign** Thinklet が、**API** トリガーを設定した関連 MIM キャンペーンを使用していることを確認します。このキャンペーンは、事前に Nexthink で設定および公開しておく必要があります。
   * キャンペーンに **単一回答** の質問のみが含まれていることを確認します。 このページの [#notify-mim-team-members-with-a-nexthink-campaign](#notify-mim-team-members-with-a-nexthink-campaign "mention") セクションを参照してください。
3. ServiceNow にコールバックするために、ワークフロー ロジック内で **Campaign** Thinklet の後に **Service/API** Thinklet があることを**確認してください**。

Nexthink ワークフローの準備ができたら、ServiceNow ワークフローは MIM チームメンバーに属するデバイスの Collector ID を取得し、Nexthink Workflows API を通じてこのデータを送信して Nexthink ワークフローをトリガーします。

{% hint style="info" %}
セットアップの詳細については、以下のドキュメントを参照してください。

* [キャンペーンの作成と設定](/platform/ja/user-guide/campaigns/managing-campaigns/creating-campaigns.md)
* [ワークフローの作成](/platform/ja/user-guide/workflows/creating-workflows.md)
  * [キャンペーンThinklet](/platform/ja/user-guide/workflows/creating-workflows/configuring-thinklets/campaign-thinklet.md)
  * [サービス/APIシンクレット](/platform/ja/user-guide/workflows/creating-workflows/configuring-thinklets/service-api-thinklet.md)
* [Nexthink Workflow API のドキュメント](https://docs.nexthink.com/api/workflows)
  {% endhint %}

**ServiceNow での操作:**

ServiceNow ワークフローに、以下のフィールドを含む新しい **REST** ステップを作成します：

* **接続**: 直接接続を定義します。
* **ベース URL**: `https://<instancename>.api.<region>.nexthink.cloud`
* **リソースパス**: `/api/v1/workflows/execute`
* **HTTP メソッド**: POST
* **ヘッダー**：
  * **Authorization**: ステップ3で生成したトークンを使用し、ステップ4と同じ Data Picker およびフィルターの手順を実行します。
  * **コンテンツタイプ**: application/json
* **Request Body**: Nexthink Workflow をトリガーするために必要な本文コンテンツを追加します。

{% code overflow="wrap" %}

```json
{
  "workflowId": "<#yourworkflowId>",
  "devices": [
    "<データピッカーを使用して 3 - REST Step > Response Body を選択し、フィルターを適用してステップ 4 から Collector UID を抽出>"
  ],
  "params": {
    "sysId": "<データピッカーを使用して 1 - Script Step > sysID を選択>"
  }
}
```

{% endcode %}
{% endstep %}

{% step %}

### Nexthink キャンペーンで MIM チームメンバーに通知する

トリガーされると、ステップ5「[#trigger-the-nexthink-mim-workflow](#trigger-the-nexthink-mim-workflow "mention")」で設定した Nexthink ワークフローは、MIM チームメンバーのデバイスに緊急 Nexthink キャンペーンを送信します。これにより、メンバーは問題を解決するために直ちに対応できます。

次のスクリーンショットは、MIM チームメンバーに表示されるキャンペーンを示しています：

<div align="left"><figure><img src="/files/UnMicf5UAHCB3sDi6sM4" alt="" width="338"><figcaption></figcaption></figure></div>

キャンペーンには次の内容が含まれます：

* **一般情報**: インシデントや問題に関する詳細。
* **ウォールームに参加するリンク**: チームメンバーがリアルタイムで連携するために仮想ウォールームに参加するための直接リンク。
* 応答用の選択肢：

<details>

<summary>キャンペーンの回答オプション: <strong>確認</strong></summary>

**確認** のキャンペーン回答は、メッセージを受信し参加することを確認するものです。

MIM チームメンバーが **確認** をクリックすると、Nexthink は War Room 通話に参加するためのリンクを使用したとみなします。

その後、システムは別の緊急キャンペーンを送信し、チームメンバーは P1/P2 インシデントで考えられる根本原因のリストから選択できます。

<div align="left"><figure><img src="/files/lbCexGVL0NokWXhSOXji" alt="" width="248"><figcaption></figcaption></figure></div>

MIMチームメンバーがキャンペーン内でオプションを選択すると、ワークフローは彼らの応答に基づいて条件付きチェックをトリガーします。 次に、ServiceNow API を呼び出して、最初の P1/P2 チケットを解決担当チームのキューに移動します。

</details>

<details>

<summary>キャンペーンの回答オプション: <strong>後で通知</strong></summary>

**後で通知** のキャンペーン回答を使用すると、チームメンバーは回答を後回しにできます。

MIM チームメンバーが **後で通知** を選択すると、Nexthink ワークフローは設定した時間が経過するまで待機し、最初のキャンペーンを再送信します。 次のスクリーンショットは、Nexthink ワークフロー ロジックデザイナーでの表示を示しています。

<div align="left"><figure><img src="/files/F26dLQQQsKJywTVTavxo" alt="" width="315"><figcaption></figcaption></figure></div>

Nexthink ワークフローは、チームが次のステップに進む前に、MIM チームメンバーがキャンペーンを確認するかアクションを実行するまで待機します。

MIM チームメンバーが **後で通知** を再度選択した場合、ワークフローは設定した時間が終了するまで待機し、**確認***.* という単一の選択肢のみを含む最終通知キャンペーンを送信します。ユーザーに表示される内容は、以下の画像で確認してください。

<div align="left"><figure><img src="/files/fsH1sjnfqrbyMn8H2HIR" alt="" width="338"><figcaption></figcaption></figure></div>

</details>
{% endstep %}

{% step %}

### 統合を検証する

MIM 通知を自動化した後、テスト用の P1 または P2 チケットをトリガーして統合を検証し、根本原因が選択された後に ServiceNow がチケット更新を受信することを確認します。
{% endstep %}
{% endstepper %}


---

# Agent Instructions
This documentation is published with GitBook. GitBook is the documentation platform designed so that both humans and AI agents can read, navigate, and reason over technical content effectively. Learn more at gitbook.com.

## Querying This Documentation
If you need additional information that is not directly available in this page, you can query the documentation dynamically by asking a question.

Perform an HTTP GET request on the current page URL with the `ask` query parameter, and the optional `goal` query parameter:

```
GET https://docs.nexthink.com/platform/ja/solutions/automating-major-incident-management.md?ask=<question>&goal=<endgoal>
```

`ask` is the immediate question: it should be specific, self-contained, and written in natural language.
`goal` is optional and describes the broader end goal you are ultimately trying to accomplish on behalf of the user. GitBook uses it to tailor the answer towards what is most useful for that goal.

The response will contain a direct answer to the question and relevant excerpts and sources from the documentation.

Use this mechanism when the answer is not explicitly present in the current page, you need clarification or additional context, or you want to retrieve related documentation sections.