> For the complete documentation index, see [llms.txt](https://docs.nexthink.com/llms.txt). Markdown versions of documentation pages are available by appending `.md` to page URLs; this page is available as [Markdown](https://docs.nexthink.com/platform/ja/user-guide/using-finder-classic/monitoring-it-custom-metrics-with-finder-classic/following-the-evolution-of-a-metric-classic.md).
# メトリックの進化を追う (クラシック)
## 概要
Finderでメトリクスを定義した後、その値の推移をwebインターフェースから追跡します。メトリクス用にさまざまな可視化オプション(*widgets*)を選択します。
webインターフェースにメトリクスを追加するには、個人用dashboardを作成する権限を持つユーザーである必要があります。自身のdashboardを作成する権限がない場合でも、ロールに割り当てられたdashboardは表示できます。
## メトリクスの追加
webインターフェースにメトリクスを追加するには、dashboardに挿入します。既存のdashboardを再利用するか、新しいものを作成することができます。いずれの場合でも、dashboardは\_Basic\_タイプのモジュールに所属する必要があります。
Basicモジュールのdashboardは最初は空で、メトリクス用のwidgetを追加し整理できる空白ページのみが表示されます。 dashboardにいくつかのタイプのwidgetを組み合わせて、メトリクスをさまざまな視点から見ることができます。
新しいBasicモジュールとdashboardを作成するには:
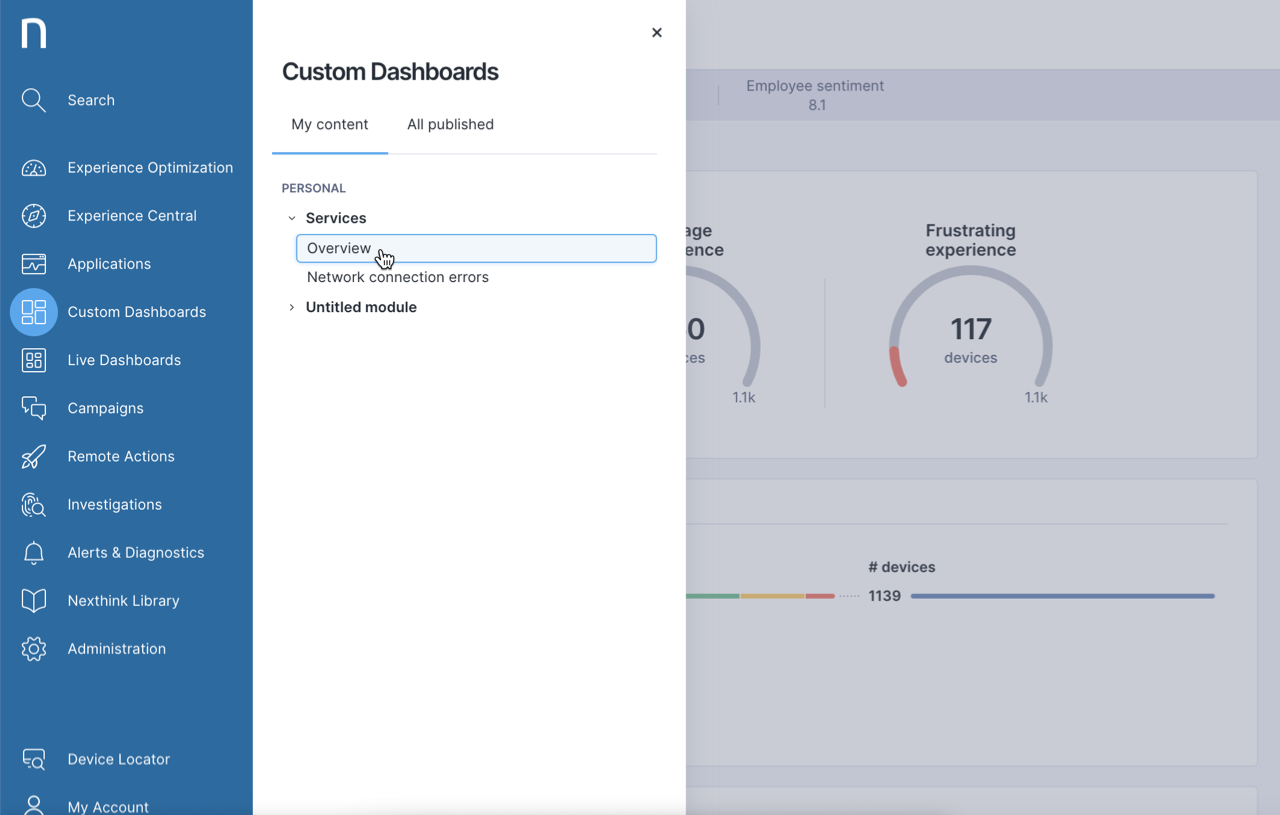
1. メインメニューから**Custom Dashboards**を選択します。
2. **My content**タブをクリックします。
3. **サービス**セクションから**概要**dashboardを選択します。
4. ページの右上にあるアクションメニューを選択します。
5. メニューの下部で\*\*新しいモジュールを作成...\*\*を選択します。
6. 作成するモジュールのタイプとして**Basic**を選択します。
7. デフォルトの空のdashboardを持つ新しいBasicモジュールがwebインターフェースに表示されます。
8. (オプション)モジュールとdashboardの名前を変更するには、もう一度メニューアイコンをクリックし、\*\*名前を変更...\*\*を選択します。
1. モジュール名とdashboard名の下に新しい名前を入力します。
2. **完了**をクリックします。
または、既存のdashboardをモジュールナビゲーションツールから選択して、左側の濃い青のリボンに表示される:
1. モジュールナビゲーションツールをクリックします(現在のモジュール名とdashboard名が表示されます)。
* 公開されたコンテンツを表示する権限があり、実際に公開されたモジュールが存在する場合、**My content**と**All published**のルブリックが表示されます。
1. この場合は、**My content**をクリックします。
2. **個人**セクションからBasicモジュールを選択します。あなた自身のものであるモジュールのみが編集可能です。
* **個人**セクションが表示されない場合、dashboardを作成する権限がありません。管理者に問い合わせてください。
* **個人**セクションにモジュールがない場合、メッセージ**個人モジュールなし**が表示されます。ここをクリックして作成します。\*\*:
* メッセージにある**ここ**をクリックして、上記の方法に代わる最初の個人モジュールを作成します。
* 他のセクション(使用しているロールに含まれるdashboard、または**全ての公開済み**ルブリックがある場合)からdashboardを選択し、それを個人セクションにコピーして修正します:
1. dashboardが開かれた状態で青のリボンの右側にあるメニューアイコンをクリックします。
2. メニューから**自分のコンテンツにモジュールをコピー**を選択します。
3. モジュール内の利用可能なdashboardのいずれかを選択します。
新しいdashboardまたは既存のdashboardのいずれかが画面に表示されたら、そこにメトリクスを追加します:
1. 暗い青のリボンの右側にあるメニューアイコンをクリックします。
2. **DASHBOARD**セクションで**コンテンツを編集**を選択します。 dashboardは今、編集モードになっています。
* dashboardが空の場合、プラス記号が表示されます。
* dashboardにコンテンツがある場合、既存のwidgetの限界をカーソルをホバリングするとプラス記号が表示されます。
3. プラス記号の1つをクリックして、その場所にメトリクス用の新しいwidgetをdashboardに追加します。
* widgetは複数のメトリクスを保持できます。既存のwidgetにメトリクスを追加したい場合は、widgetの右上隅にカーソルをホバリングすると表示される歯車アイコンをクリックして、**編集**を選択します。
4. 作成したいwidgetのタイプを選択します:
* KPI。
* テーブル。
* 折れ線グラフ。
* 棒グラフ。
5. widgetを追加するためにダイアログを入力します:
1. (オプション)widgetのタイトルを入力します。
2. **メトリクスを追加**ボタンをクリックします。
3. 利用可能なメトリクスのリストからメトリクスを選択します。
4. **追加**ボタンをクリックします。メトリクスのリストがwidgetのプレビューに変わります。
5. 選択したwidgetのタイプに応じて、**表示**オプションを設定します。
6. (オプション)widgetに追加したいメトリクスの数だけ**メトリクスを追加**を再度クリックします。
7. widgetの編集を完了し、dashboard編集に戻るには、**完了**をクリックします。
6. dashboardの編集を終了するには、編集モード中に右側の濃い青のリボンにあるチェックマークをクリックします。
---
# Agent Instructions
This documentation is published with GitBook. GitBook is the documentation platform designed so that both humans and AI agents can read, navigate, and reason over technical content effectively. Learn more at gitbook.com.
## Querying This Documentation
If you need additional information that is not directly available in this page, you can query the documentation by asking a question.
Perform an HTTP GET request on the following URL with the `ask` and `goal` query parameters:
```
GET https://docs.nexthink.com/platform/ja/user-guide/using-finder-classic/monitoring-it-custom-metrics-with-finder-classic/following-the-evolution-of-a-metric-classic.md?ask=&goal=
```
`ask` is the immediate question: it should be specific, self-contained, and written in natural language.
`goal` is what the user is ultimately trying to achieve, the reason they need the answer. Sharing it helps GitBook give you a better, more relevant answer. A goal is most helpful when it describes the outcome the user wants rather than restating the question. For example, with `ask=how do I create an API token`, a goal like `automate deployments from our CI pipeline` lets GitBook tailor the answer to that use case.
The response will contain a direct answer to the question and relevant excerpts and sources from the documentation.
Use this mechanism when the answer is not explicitly present in the current page, you need clarification or additional context, or you want to retrieve related documentation sections.