Device View
Device View helps IT support teams gain deeper insights into troubleshooting scenarios on a device level. Determine where an issue stems from and get a head start on resolution.
Inspect device properties and activities that span a period of up to 30 days.
Required permissions for Device view
From the Nexthink web interface, go to Administration > Profiles in the main menu to configure the profile permission settings required by Device View:
Tick the following permissions under the Diagnostics drop-down:
View device view
View all checklists
Manage all checklists
View Diagnostics dashboards
Tick the following permissions under the Remote Actions drop-down:
Execute all remote actions
Tick the following permission under the Investigations drop-down:
Create investigations
Tick the following permission under the Applications drop-down:
View all application dashboards
Tick the following permission under the Collaboration Tools drop-down, if you have a Collaboration Experience license from Nexthink:
View all collaboration tools dashboards
Accessing Device view
Access Device View depending on your preferences and requirements:
Access through Search
Access through Investigations
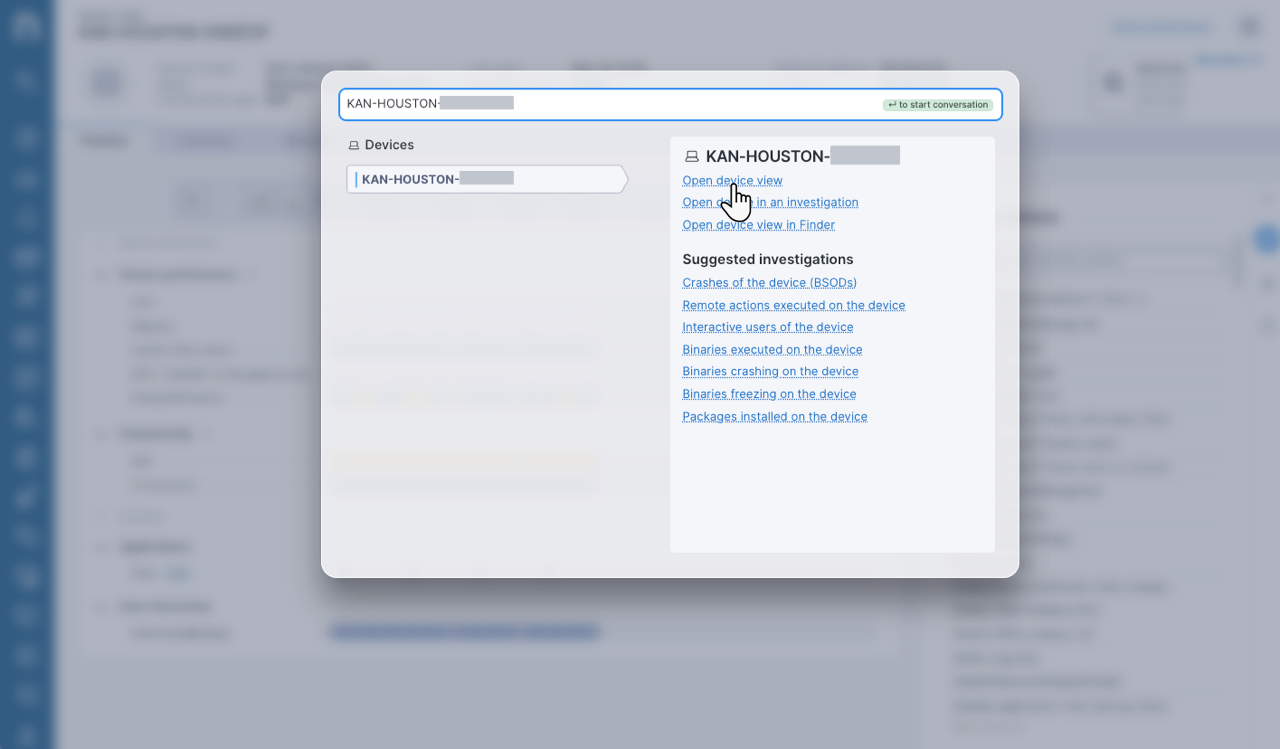
Accessing Device View through Search
Select the Search option from the main menu and start typing the name of the device.
Select the device from the results under Devices.
Click Open device view in the right column.
Accessing Device View through Investigations
Select Investigations from the main menu to create or edit an existing investigation.
Enter an NQL query in the NQL Editor to return a device or a list of devices.
Click on the device name or click on the action menu next to it and select Open device view in a new tab.
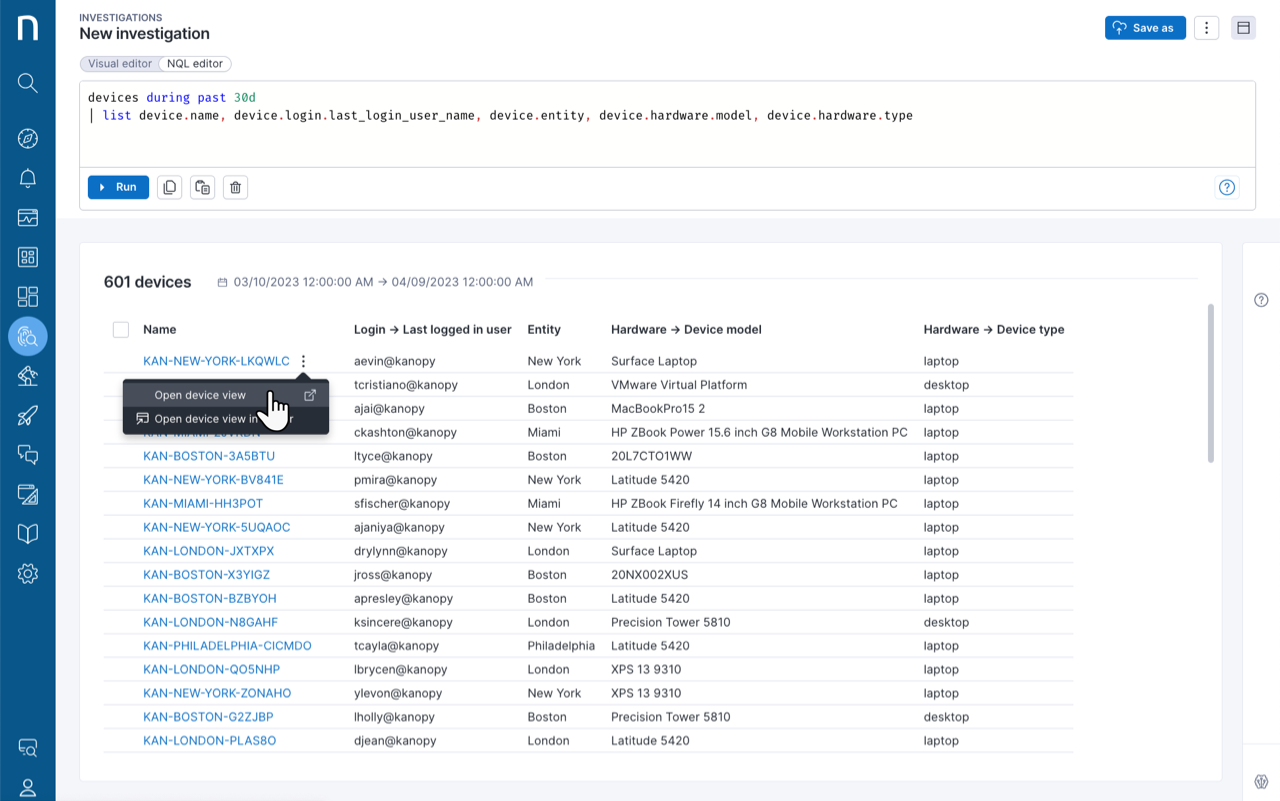
NQL example for a device investigation
Return a device with the name "MyDeviceNameExample".
devices
| where device.name == "MyDeviceNameExample"
Refer to the NQL documentation for more information about how to write queries.
Using Device View
Find on the Device View page:
The Timeline tab allows you to explore events in chronological order on the device, with the ability to gain further insights using intuitive tooltips and a right-side panel. Additionally, you can drill down the timeline sections into specific events to gain a detailed view of various activities.
Refer to the Timeline documentation to learn how to use and interpret the timeline.
The Checklists tab provides you with immediate insights into key device attributes.
Refer to the Checklists documentation to learn how to use and interpret default and custom checklists.
The Network tab allows you to visualize and troubleshoot network-related issues prefiltered to the device in question. The Network tab is aligned to the timeframe selected within the Timeline tab.
Refer to the Network view documentation to learn how to use and interpret the network view visualization.
In addition, the Device View allows you to:
Use the Device View right-side panel for insightful information and drill-downs, including a remote action list to execute associated actions on a device.
Access the User Overview dashboard for a comprehensive overview of a user's digital experience with dedicated tabs for areas like DEX, application usage, and virtual session performance.
Refer to the User Overview documentation for more information
Accessing User Overview and device-specific drilldowns
To access device-specific benchmarks, investigations and dashboards, from the Device View page:
Choose one of the options from the action menu next to the device name in the top-left corner to access:
Open device benchmark dashboard.
Diagnose for diagnostics dashboards.
Retrieve all pre-filled investigation queries in a device context.
To access the User Overview dashboard, from the Device View page:
Click Open user overview from the action menu next to the user name in the top-right corner.
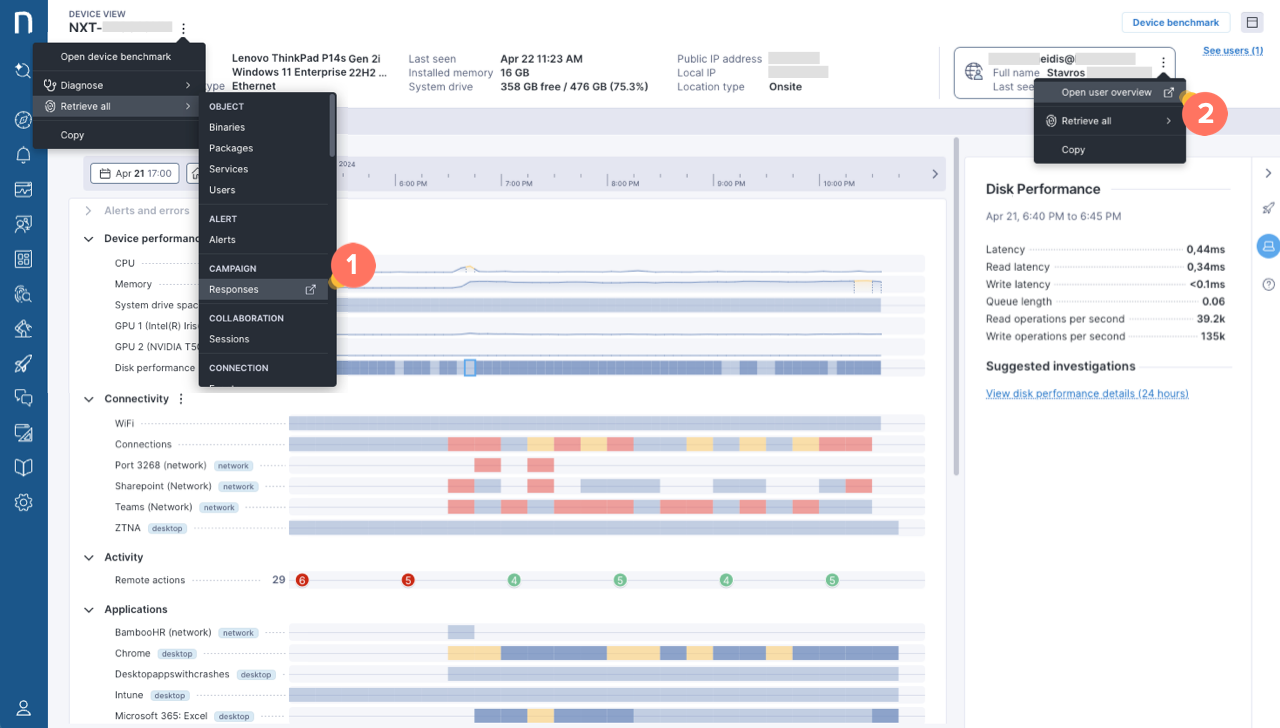
You can Copy the device or user information if needed.
Using the Device View right-side panel
Depending on the Device View tab you open, the right-side panel displays different content:
Click the device icon on the right-side panel when you open the Timeline tab to view details of selected timeline events. Refer to the Timeline documentation for more information.
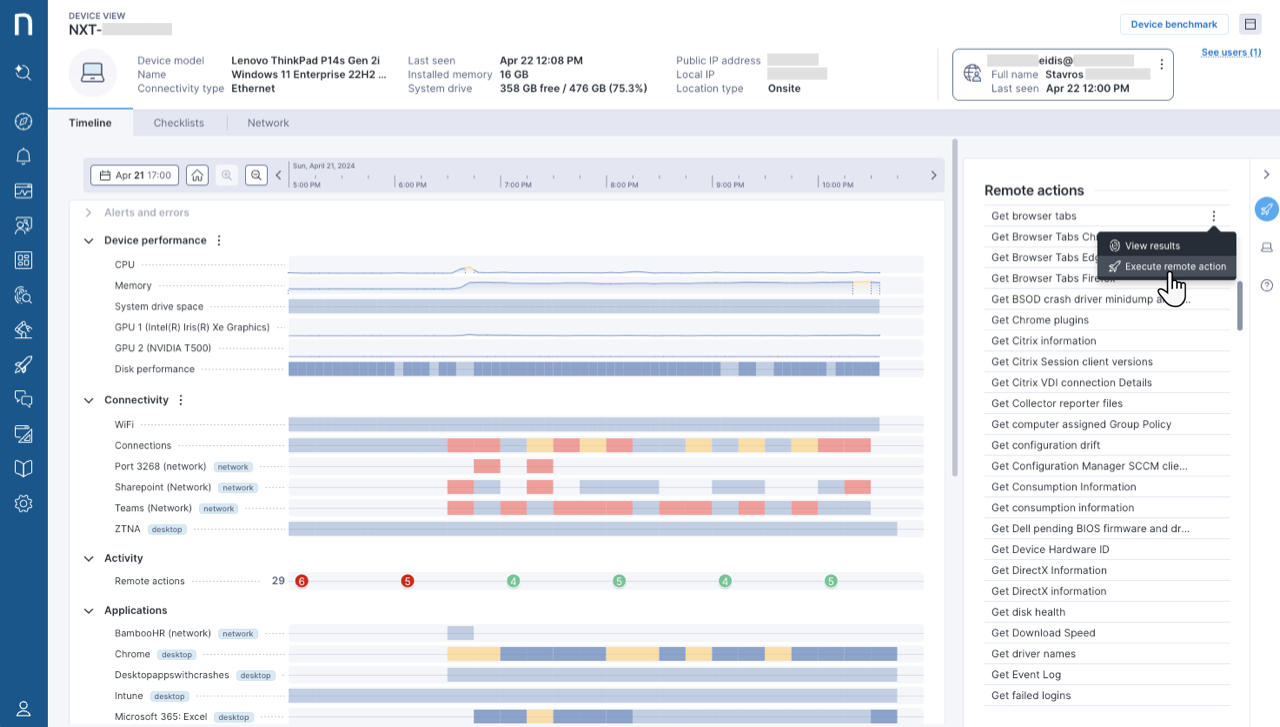
Click the Remote actions icon on the right-side panel when you open the Timeline, Checklists or Network tab to view a list of all remote actions available for your profile.
Hover over a remote action to reveal the action menu:
Select View results to navigate to the Investigations page with the remote action results.
Choose Execute remote action to run the remote action on the selected device.
Refer to the Using Device View for call quality issues documentation to leverage the Timeline and Checklists tabs for collaboration tools troubleshooting.
RELATED TOPICS: