# Managing campaigns
The Campaigns Administration page lets you view, create, and edit your campaigns.
## Accessing the Campaigns Administration page
To navigate to the Campaigns Administration page:
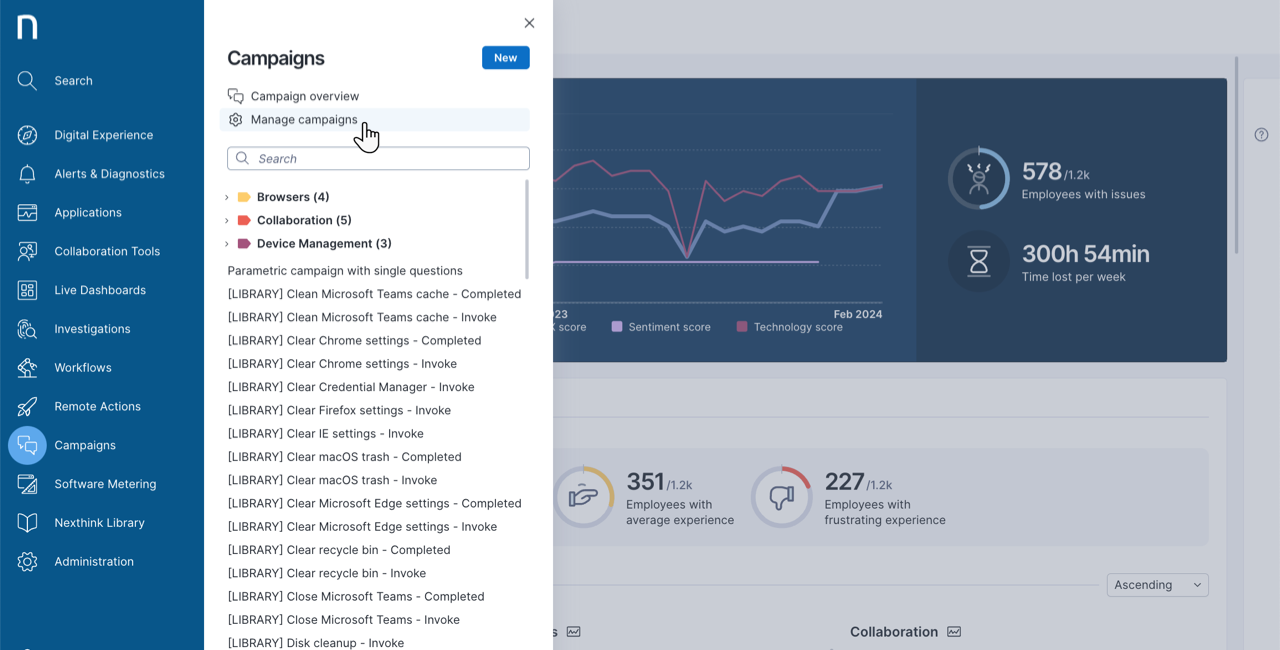
* Select **Campaigns** from the main menu.
* Click on **Manage campaigns** in the navigation menu.
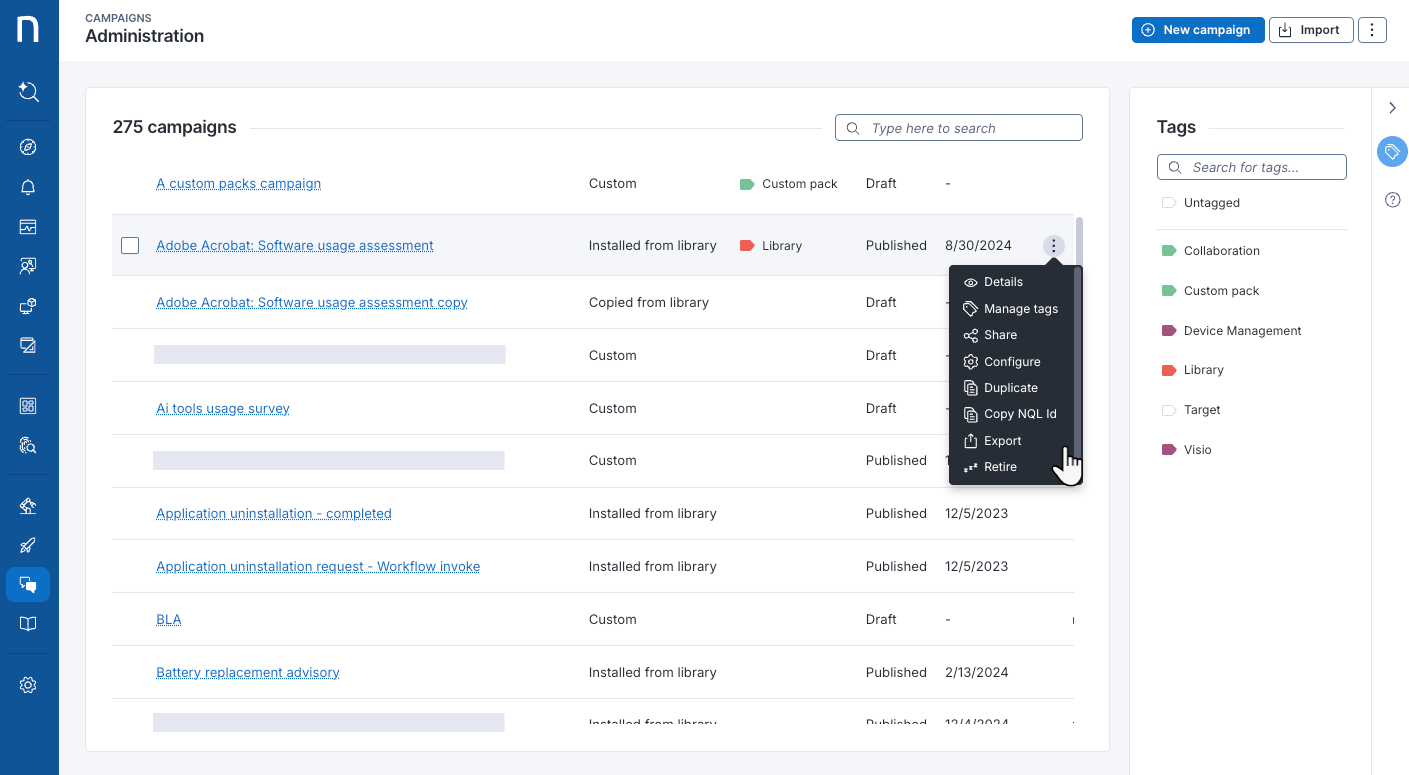
Consult the table of all available campaigns on the Campaigns Administration page. The table is organized by:
* **Name**: Edit the campaign by clicking on its name.
* **Origin**: Campaigns can be **Custom**, **Copied from library** or **Installed from library**.
* **Tags**: View tags associated with a campaign.
* **Status**: Campaigns can be in a **Draft**, **Published** or **Retired** state.
* **Last published**: The date a campaign was last published.
* **Triggers**: The trigger method can be **Manual**, **Scheduled**, **Remote Action**, **API** or **Workflow**.
You can search for a specific campaign by name using the search box at the top right of the table.
Refer to the [Creating campaigns](https://docs.nexthink.com/platform/user-guide/campaigns/managing-campaigns/creating-campaigns) documentation for more information about creating custom campaigns and configuring library campaigns.
## Working with campaign actions
Hover over a campaign to reveal the action menu on the right side of the row. The action menu is context-sensitive and changes depending on the status of a campaign. See below for more details.
{% hint style="info" %}
When you delete a campaign, the system deletes all responses associated with the campaign.
{% endhint %}
### Configuring and editing campaigns
Campaign-level edit permissions cannot be granted to roles with limited view domains.
* Edit custom or campaigns copied from library that are in the **draft** or **retired** states.
* Configure selected options for system and library campaigns that are in the **draft** or **retired** states.
* Users who have a limited view domain can edit campaigns only when the campaign uses a manual trigger.
* If a campaign uses another trigger type, the campaign opens in read-only mode.
### Sharing a campaign
Share a campaign with user profiles and grant them appropriate permissions to **View dashboards**, **Edit** or **Trigger** campaigns. Only users with the **Manage all campaigns** permission enabled can see the **Share** option. Refer to the [Roles](https://docs.nexthink.com/platform/user-guide/administration/account-management/roles) documentation for more information about user permissions.
* Hover over a campaign to reveal the action menu and select **Share**. The Share campaign modal opens.
* In the **Add profile** text field, type in the user profiles you wish to share the campaign with.
* From the **Select permissions** drop-down menu, select the appropriate permissions for the profile. The choices are:
* **View dashboards**: Access the campaign dashboards from the navigation panel. The system shows published and retired campaigns.
* **Edit**: Edit a campaign.
* **Trigger**: Trigger a campaign from the Investigation module if the campaign's trigger has been set to *Manual*.
* Click **Clear all** to disable all permissions.
* Click the **Grant permissions** button to share the campaign.
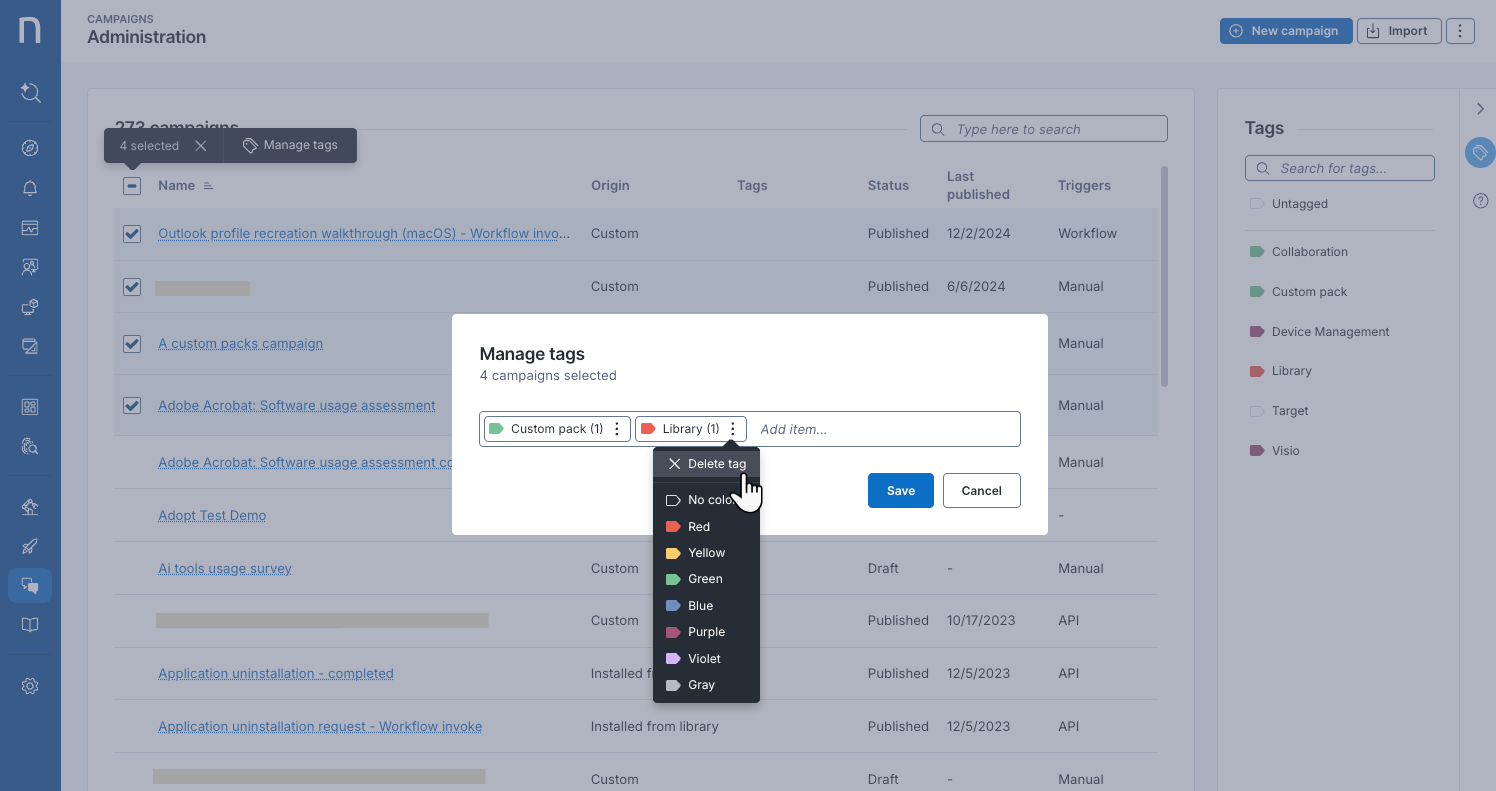
### Tagging a campaign
Tagging allows you to sort and filter the campaigns table quickly. Open the **Tags** right-side panel to:
* Search for a specific tag at the top of the panel.
* Select one or more tags to filter the campaigns table.
To add one or more tags to a campaign, from the **Campaigns > Manage Campaigns** page:
1. Hover over a campaign to display the action menu and choose **Manage tags**.
2. From the **Manage tags** pop-up, you can:
* Type in a new tag or choose an existing one to add it to the campaign.
* Open the action menu of a specific tag item to **Delete tag** or change the tag color.
* Deleting a tag only removes it from the campaign it is associated with.
3. Alternatively, select multiple campaigns to **Manage tags** in bulks.
## Importing campaigns
To import campaigns—in JSON—from your local device:
1. Click the **Import** button in the top-right corner of the Campaigns Administration page.
2. **Choose** or **drag** multiple JSON files from your hard drive to import them into the system.
All imported items are listed as custom.
{% hint style="warning" %}
Before importing a [custom campaign](#custom-campaigns), export and modify an existing campaign as needed. This ensures your JSON file matches the required format, avoiding errors or malfunctions.
Nexthink does not guarantee that imports from external sources function correctly or remain editable.
{% endhint %}
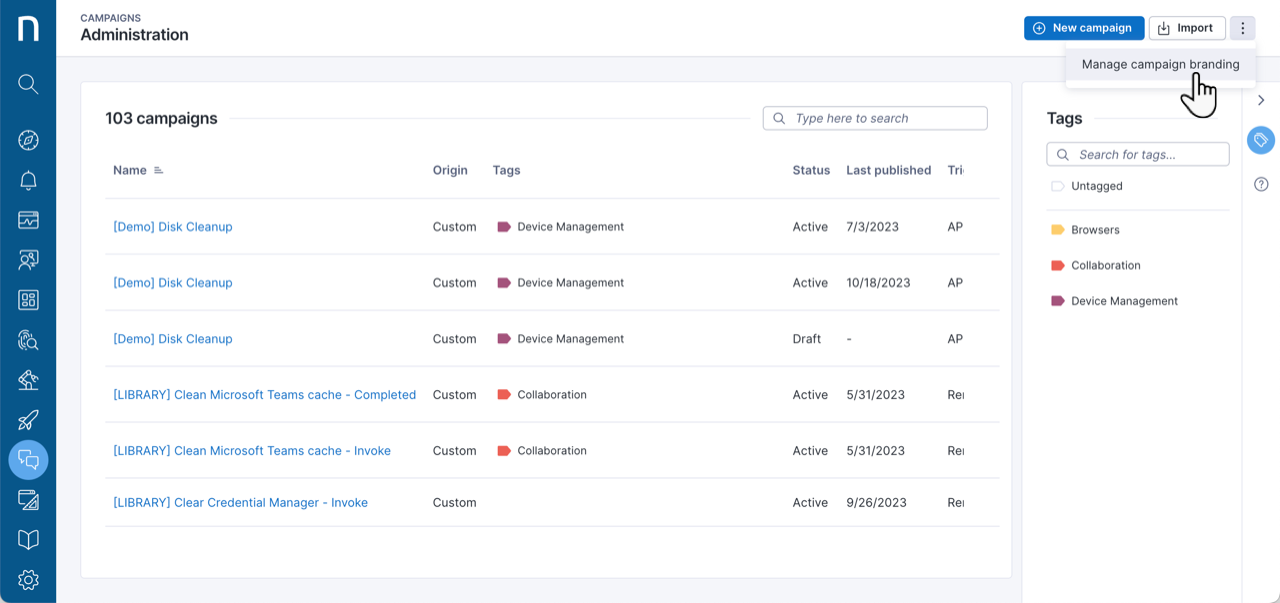
## Branding your campaigns
Brand your campaigns with a logo and custom colors to make employees comfortable and build their trust when answering campaign questions.
* Click on the action menu at the top right corner of the page.
* Select **Manage campaign branding** to open the Campaign branding page.
Refer to the [Configuring Campaigns branding](https://docs.nexthink.com/platform/user-guide/campaigns/managing-campaigns/campaigns-branding) documentation for more information.