> For the complete documentation index, see [llms.txt](https://docs.nexthink.com/platform/llms.txt). Markdown versions of documentation pages are available by appending `.md` to page URLs; this page is available as [Markdown](https://docs.nexthink.com/platform/ja/user-guide/administration/system-configuration/digital-experience-score-management.md).
# Digital Experience Score管理
Nexthink は、DEX スコアを設定してお客様の環境に合わせてカスタマイズできるようにすることで、最も有意義なデータおよびレポート機能の提供に努めています。 DEX スコアは、[Digital Experience](/platform/ja/user-guide/digital-experience.md) モジュールに直接関連付けられています。
## Digital Experience Score 設定ページへのアクセス
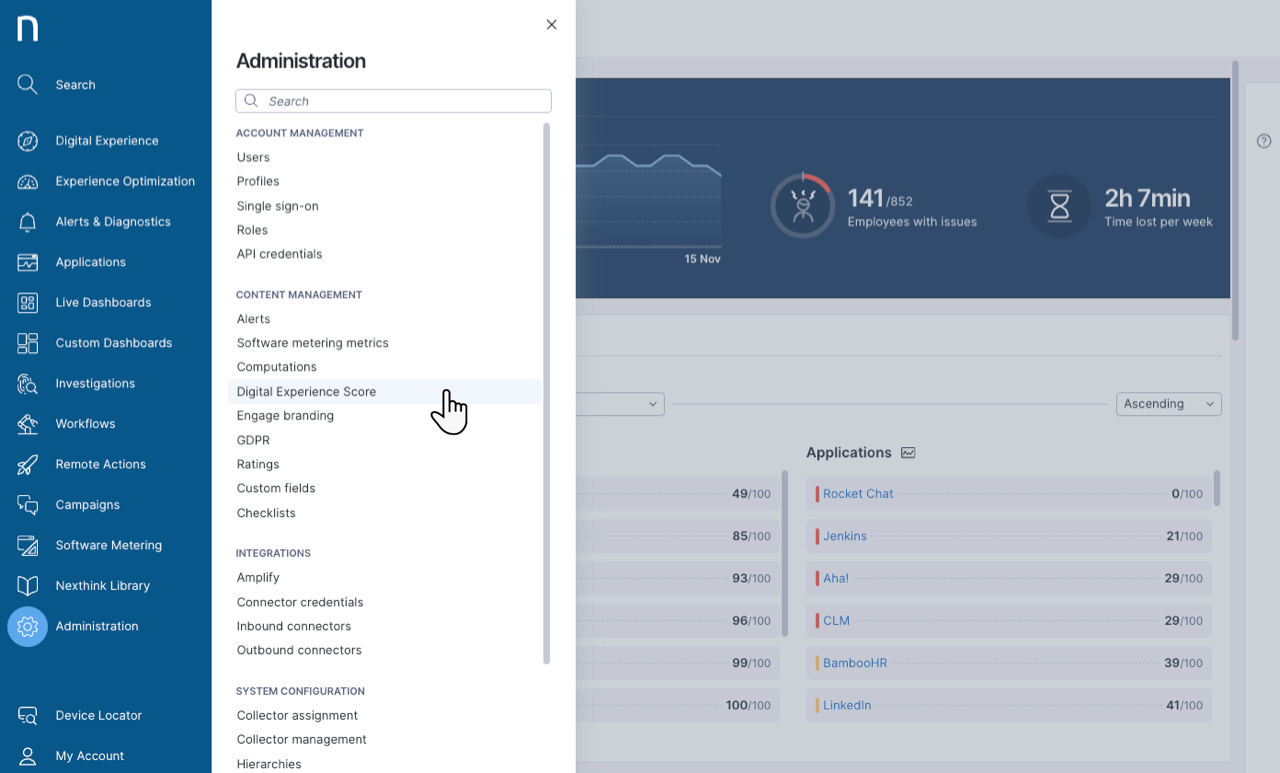
Digital Experience Score の設定ページにアクセスするには:
* メインメニューから **Administration** を選択します。
* ナビゲーションパネルの Content Management セクションで **Digital Experience Score** をクリックします。
適切なロールを持つユーザーのみが設定ページにアクセスできます。ユーザーに適切な権限を割り当てる方法の詳細については、[Digital Experience の利用開始](/platform/ja/user-guide/digital-experience/getting-started-with-digital-experience.md)を参照してください。
## Applications タブの設定
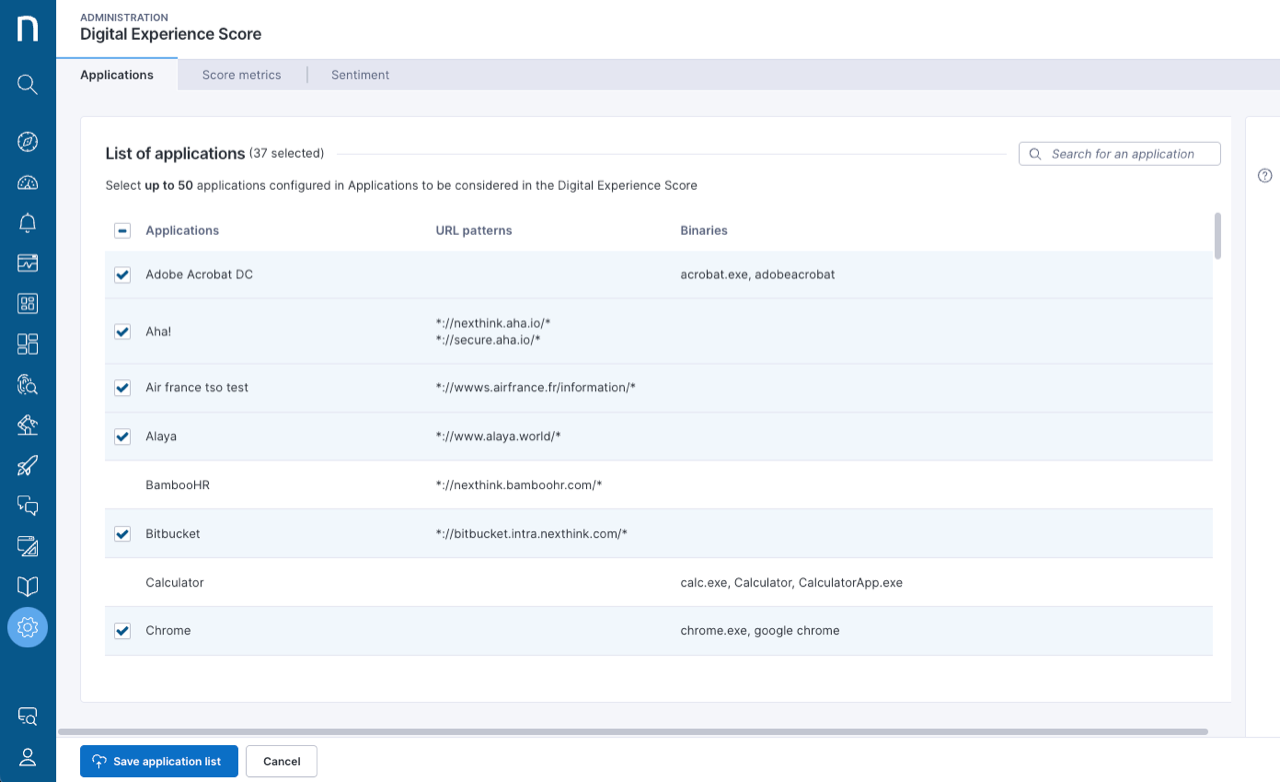
Digital Experience Score の設定ページの **Applications** タブから:
* アプリケーションを DEX スコアに追加し、システムが総合スコアを計算するときに考慮するようにします。
* DEX スコア用に選択できるアプリケーション数には上限があります。設定画面には、上限に近づいたときに情報が表示されます。
{% hint style="info" %}
詳細については、[アプリケーションの管理](/platform/ja/user-guide/applications/setting-up-and-managing-applications/managing-applications.md)のドキュメントを参照してください。
{% endhint %}
## Score metrics タブの設定
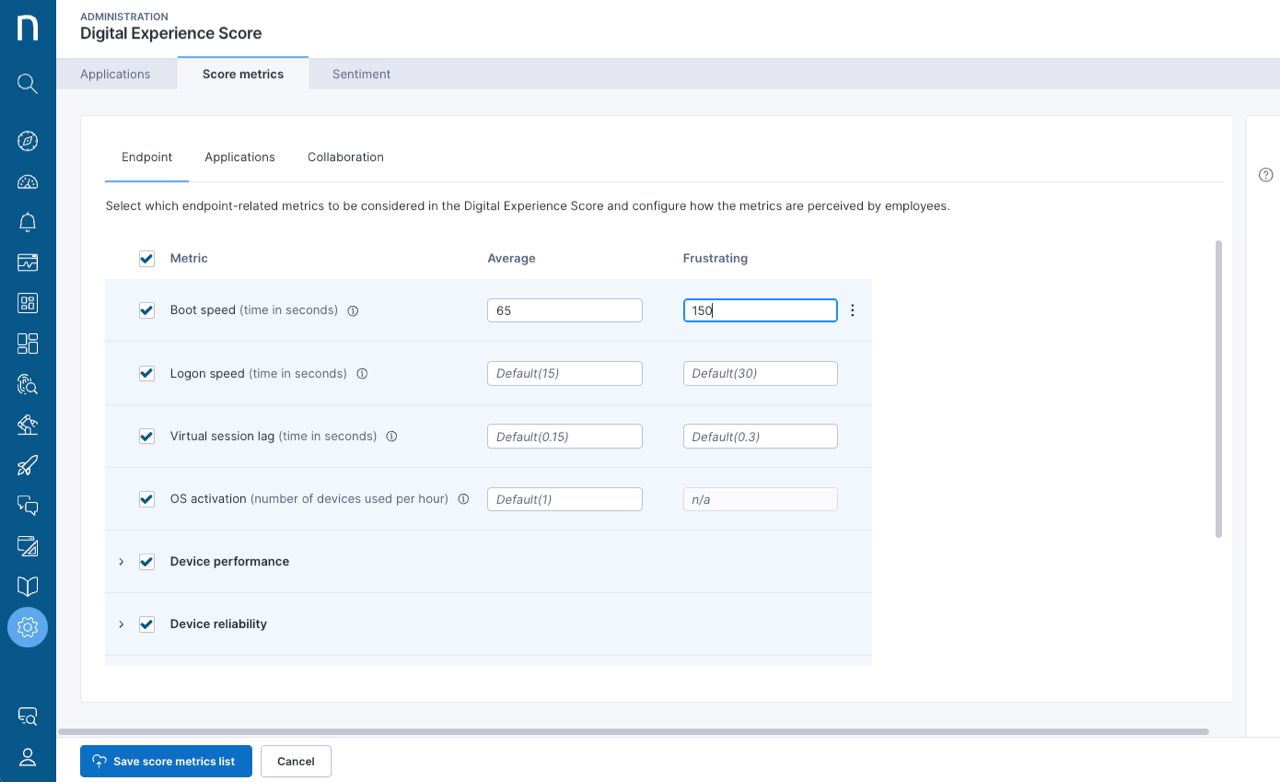
Digital Experience Score の設定ページの **Score metrics** タブで、各スコアメトリックの Experience 計算における **Average** および **Frustrating** のしきい値を設定します:
* [エンドポイント](#digitalexperiencescoremanagement-endpointendpoint)
* [アプリケーション](#digitalexperiencescoremanagement-applicationsapplications)
* [コラボレーション](#digitalexperiencescoremanagement-collaborationcollaboration)
{% hint style="info" %}
システムは、Nexthink のベンチマーク情報に基づいてデフォルトの閾値を定義します。
{% endhint %}
### エンドポイント
1. **Score metrics** タブをクリックします。
2. **Endpoint** タブを選択します。
3. DEX スコアの計算でシステムが考慮するノードを選択します。
4. **Average** と **Frustrating** の閾値を定義します。
5. **Save score metrics list** をクリックします。
{% hint style="info" %}
Nexthink web インターフェースの右側にある製品内ドキュメントも参照できます。
{% endhint %}
#### Windows メモリメトリック
* **デフォルト設定**:\
Nexthink では、メモリ関連のエクスペリエンス問題の主要な指標として **Memory Swap Rate** を使用することを推奨しています。調査では、スワップアクティビティの増加とユーザーへの影響との間に強い相関関係があることが示されています。
* **代替設定(Microsoft 準拠)**:\
Microsoft のガイダンスに厳密に準拠する場合は、代わりに以下の Windows メモリカウンターを手動で有効にできます:
* **メモリ使用量**
* **ページプール使用量**
* **非ページプール使用量**
* **コミット済みバイト数**
Nexthink の調査データに基づく詳細については、[Digital Experience の指標としてのメモリメトリック](https://edocs.nexthink.com/nexthink-infinity/infinity-specifications/digital-employee-experience-dex-specifications/memory-metrics-as-indicators-of-digital-experience)のドキュメントを参照してください。
{% hint style="warning" %}
2026年2月23日より、すべての新規 Nexthink テナントで、オペレーティングシステム別のメトリック分割がデフォルトで有効になります。
既存テナントの管理者は、**Score metrics** の **Endpoint** タブでこの機能を手動で有効にする必要があります。一度有効にすると、この変更は元に戻せません。
{% endhint %}
#### VDI
{% hint style="info" %}
VDI 固有の Digital Experience Score メトリックには、[VDI Experience](/platform/ja/user-guide/vdi-experience.md) ライセンスが必要です。詳細については、Nexthink の担当者にお問い合わせください。
メトリックの完全なリストについては、[該当する FAQ](https://docs.nexthink.com/platform/ja/user-guide/vdi-experience/vdi-experience-faq#what-new-nql-data-model-fields-does-vdi-experience-provide-compared-to-the-combined-metrics-from-ses)を参照してください。
{% endhint %}
仮想デスクトップ環境全体での正確性を確保するため、Nexthink はメトリックを物理デバイス、仮想デバイス、すべてのデバイスの 3 つのカテゴリに分けています。これにより、各デバイスタイプに合わせた正確なエクスペリエンス測定が可能になります。
このメトリック分割を有効にすると、特に物理エンドポイントと仮想エンドポイントの両方を含む混在環境において、エクスペリエンスインサイトの粒度と関連性が向上します。
デバイスカテゴリごとのメトリック分割の詳細については、[ハードメトリックと閾値](https://edocs.nexthink.com/nexthink-infinity/infinity-specifications/digital-employee-experience-dex-specifications/list-of-hard-metrics-and-thresholds#endpoint-score)のドキュメントを参照してください。
{% hint style="warning" %}
2026年1月19日より、すべての新規 Nexthink テナントで、デバイスタイプ別のメトリック分割がデフォルトで有効になります。
既存テナントの管理者は、**Score metrics** の **Endpoint** タブでこの機能を手動で有効にする必要があります。一度有効にすると、この変更は元に戻せません。
{% endhint %}
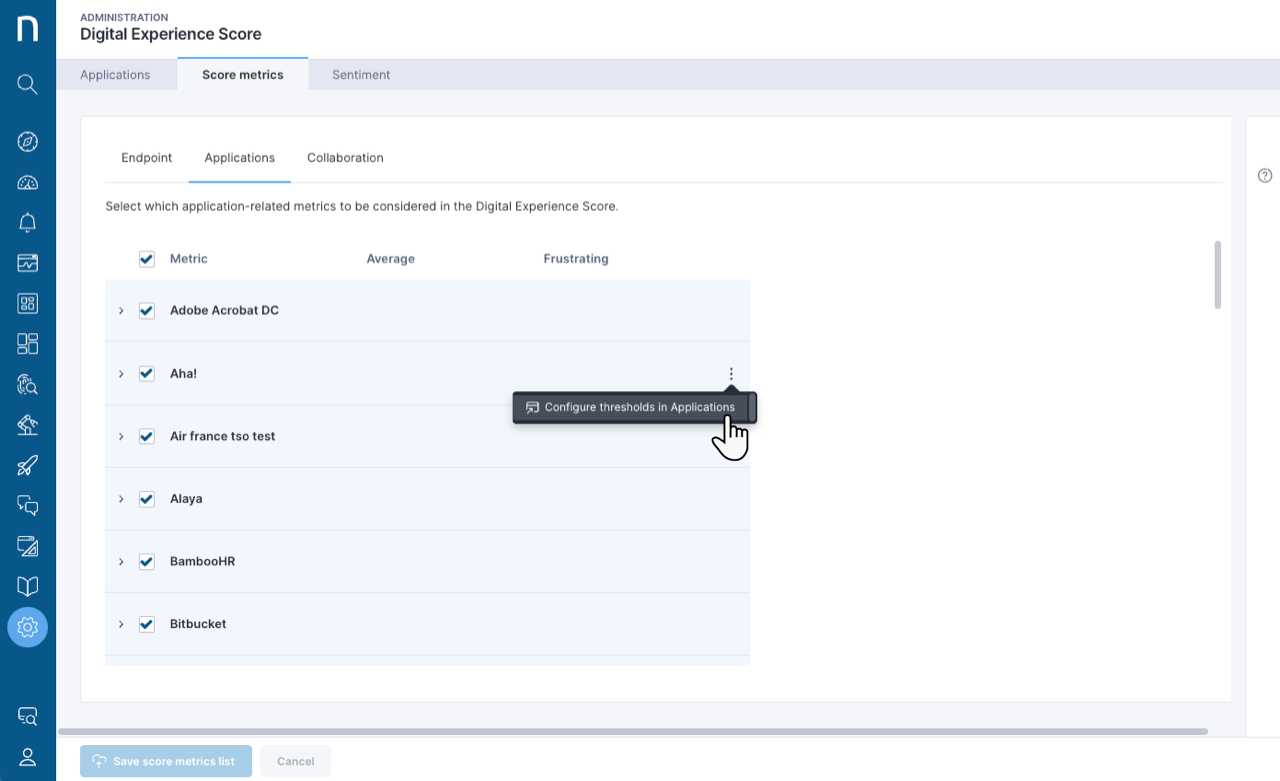
### Applications
1. **Score metrics** タブをクリックします。
2. **Applications** タブを選択します。
3. 設定するアプリケーションにカーソルを合わせ、行の右側にアクションメニューを表示します。
4. **Configure thresholds in Applications** を選択します。システムにより、Applications モジュールの設定ページにリダイレクトされます。
5. **Save score metrics list** をクリックします。
{% hint style="info" %}
Web エラー、クラッシュ、フリーズのデフォルト閾値は、現在編集できません。
{% endhint %}
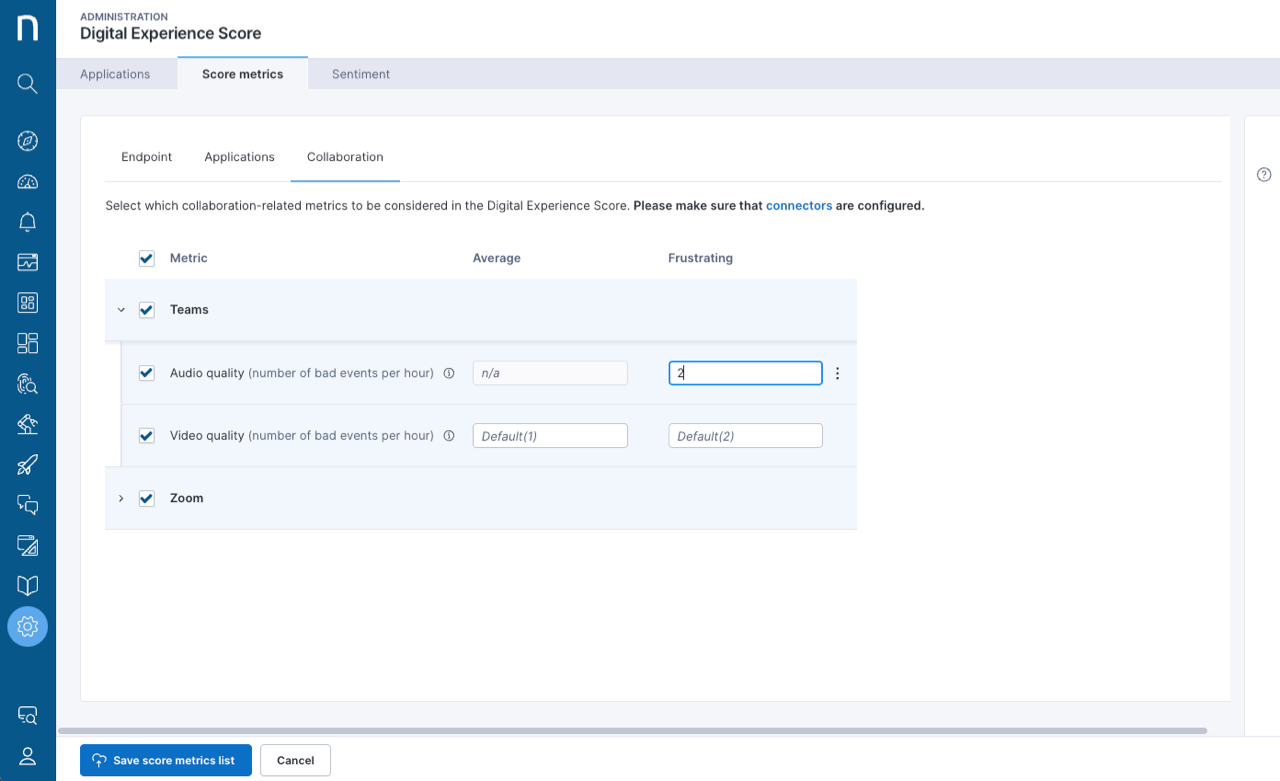
### コラボレーション
Microsoft Teams または Zoom 用の Nexthink コネクタにアクセスできる場合、これらのアプリケーションからのデータを DEX スコアに取り込むことができます:
1. **Score metrics** タブをクリックします。
2. **Collaboration** タブを選択します。
3. 管理ページでコネクタが適切に設定されていることを確認します。
4. **Save score metrics list** をクリックします。
{% hint style="info" %}
[Microsoft Teams 用コネクタ](/platform/ja/configuring_nexthink/bringing-data-into-your-nexthink-instance/integrating-nexthink-with-third-party-tools/inbound-connectors/connector-for-microsoft-teams.md)および [Zoom 用コネクタ](/platform/ja/configuring_nexthink/bringing-data-into-your-nexthink-instance/integrating-nexthink-with-third-party-tools/inbound-connectors/connector-for-zoom.md)のドキュメントを参照してください。
{% endhint %}
## ベンチマーク用のデータロケーションの有効化
Digital Experience のデータロケーションを使用して、国または州をまたいで DEX スコアデータの内部ベンチマークを行います。詳細については、[ジオロケーションの設定](/platform/ja/user-guide/administration/system-configuration/data-management/environment/product-configuration.md)のドキュメントを参照してください。
## DEX スコア構造の更新を有効にする
デフォルトの閾値やスコアメトリック用の新しいノードなど、Nexthink によって提供される DEX スコア構造の変更は、DEX スコア全体に影響するため、既存のお客様にはデフォルトで有効化されていません。
[Score metrics](#digitalexperiencescoremanagement-configuringthescoremetricstabscoremetricstab) タブにアクセスして、DEX スコア構造の更新を有効にできます。
## Sentiment タブの設定
Sentiment データを使用すると、組織のデジタルエクスペリエンスの全体像を把握するために、従業員の IT 満足度をレポートおよび評価できます。
### ステップ 1: DEX スコアキャンペーンの作成
Digital Experience で Sentiment データを使用するには、標準化された DEX スコアキャンペーンを使用する必要があります:
* Nexthink Library から [Digital Experience - Sentiment Campaign](https://www.nexthink.com/library/digital-experience-sentiment-campaign)をダウンロードできます。
* Nexthink Infinity からデフォルトのキャンペーンをコピーできます。
* キャンペーンを一から作成できます。
DEX Campaign のコンテンツおよび設定に関するガイドラインについては、[DEXキャンペーンの設定](/platform/ja/user-guide/administration/system-configuration/digital-experience-score-management/configuring-dex-campaign.md)を参照してください。
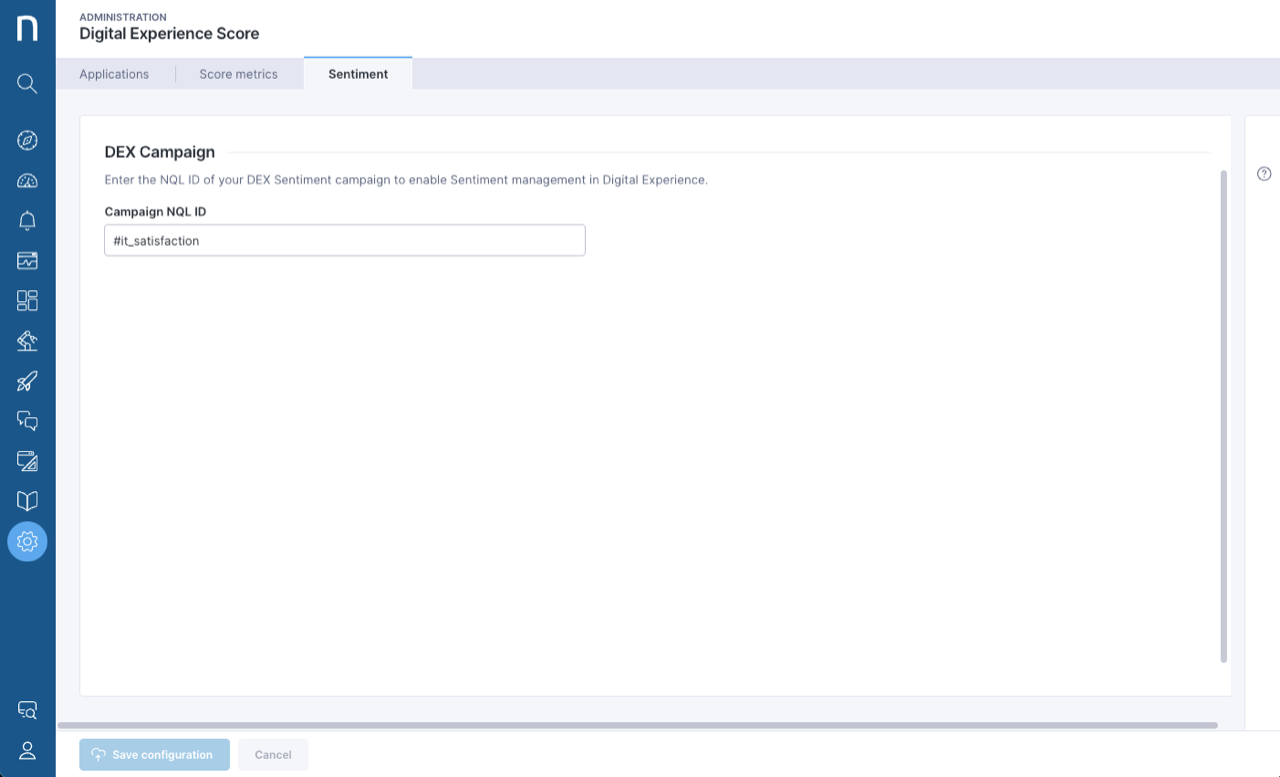
### ステップ 2: キャンペーンの NQL\_ID を入力する
Digital Experience Score 設定ページでe**:**
1. **Sentiment** タブをクリックします。
2. DEX スコアキャンペーンの **NQL\_ID** を入力すると、Digital Experience モジュールの Sentiment タブに結果が表示されます。
3. **Save configuration** をクリックします。
***
関連トピック
* [Digital Experience](/platform/ja/user-guide/digital-experience.md)
* [Digital Experience の利用開始](/platform/ja/user-guide/digital-experience/getting-started-with-digital-experience.md)
---
# Agent Instructions
This documentation is published with GitBook. GitBook is the documentation platform designed so that both humans and AI agents can read, navigate, and reason over technical content effectively. Learn more at gitbook.com.
## Querying This Documentation
If you need additional information that is not directly available in this page, you can query the documentation by asking a question.
Perform an HTTP GET request on the following URL with the `ask` and `goal` query parameters:
```
GET https://docs.nexthink.com/platform/ja/user-guide/administration/system-configuration/digital-experience-score-management.md?ask=&goal=
```
`ask` is the immediate question: it should be specific, self-contained, and written in natural language.
`goal` is what the user is ultimately trying to achieve, the reason they need the answer. Sharing it helps GitBook give you a better, more relevant answer. A goal is most helpful when it describes the outcome the user wants rather than restating the question. For example, with `ask=how do I create an API token`, a goal like `automate deployments from our CI pipeline` lets GitBook tailor the answer to that use case.
The response will contain a direct answer to the question and relevant excerpts and sources from the documentation.
Use this mechanism when the answer is not explicitly present in the current page, you need clarification or additional context, or you want to retrieve related documentation sections.
.png?alt=media)