> For the complete documentation index, see [llms.txt](https://docs.nexthink.com/platform/llms.txt). Markdown versions of documentation pages are available by appending `.md` to page URLs; this page is available as [Markdown](https://docs.nexthink.com/platform/ja/configuring_nexthink/bringing-data-into-your-nexthink-instance/integrating-nexthink-with-third-party-tools/inbound-connectors/jamf-ios-mobile-devices-connector.md).

# Jamf：iOS モバイルデバイス コネクタ

iOS モバイルデバイス向けの Jamf コネクタを使用すると、すべての iOS デバイスから追加のコンプライアンスデータを収集できるほか、特定の BYO（持ち込み）デバイスなど、Nexthink Mobile をインストールできないデバイスからのデータも収集できます。

このコネクタは、iOS モバイルオペレーティングシステム向けに特別に設計されています。 システムは、オペレーティングシステムのデバイス識別子を使用して、Jamf からインポートされたデバイスと既存のデバイスを照合します。

* 一致が見つかった場合、既存のデバイスは Jamf のデータで拡充されます。
* 一致が見つからない場合、システムはそのデバイスを新しいエントリとしてインポートします。

## デバイスフィールド <a href="#connectorforcitrixdaas-devicefields" id="connectorforcitrixdaas-devicefields"></a>

Jamf 用コネクタ：iOS モバイルデバイスは、次のデバイスフィールドをインポートします。

| Nexthink フィールド   | 説明                                                                   |
| ---------------- | -------------------------------------------------------------------- |
| `mobile_devices` | ハードウェア仕様、オペレーティングシステムの詳細、Nexthink アプリケーションデータなど、モバイルデバイスに関する情報を含みます。 |

さらに、このコネクタは、Nexthink Mobile がインストールされているデバイスに対しても、`mobile_devices.governance` グループ内の以下のフィールドに値を設定します。

|                    |                                                                                                                                                                                                                                   |
| ------------------ | --------------------------------------------------------------------------------------------------------------------------------------------------------------------------------------------------------------------------------- |
| `compliance_state` | <p>UEM によって報告される、組織のコンプライアンスポリシーと比較したデバイスの現在の準拠状況です。</p><p>Jamf とのインテグレーションでは、このステータスはコネクタ内の「非準拠デバイス Smart Group」で構成された Smart Group に基づいて決定されます。</p><p>選択した Smart Group は、非準拠と判定されたデバイスを含む Jamf Smart Group にマップされている必要があります。</p> |
| `is_encrypted`     | UEM によって報告される、デバイスストレージが暗号化されている場合は True となります。                                                                                                                                                                                   |
| `last_synced`      | UEM がデバイスと正常にデータ同期を行った最終時刻です。                                                                                                                                                                                                     |
| `名前`               | UEM システムで割り当てられたデバイス名です。                                                                                                                                                                                                          |
| `ownership_type`   | UEM によって定義された所有区分を示します。                                                                                                                                                                                                           |
| `is_supervised`    | UEM によりデバイスが監督対象となっているかを示し、より高度な管理が可能になります。                                                                                                                                                                                       |

## 前提条件 <a href="#configuring-the-connector-credentials" id="configuring-the-connector-credentials"></a>

コネクタには、Jamf で次の権限付与が必要です:

* `DeviceManagementManagedDevices.Read.All`

## コネクタの構成 <a href="#configuring-the-connector-credentials" id="configuring-the-connector-credentials"></a>

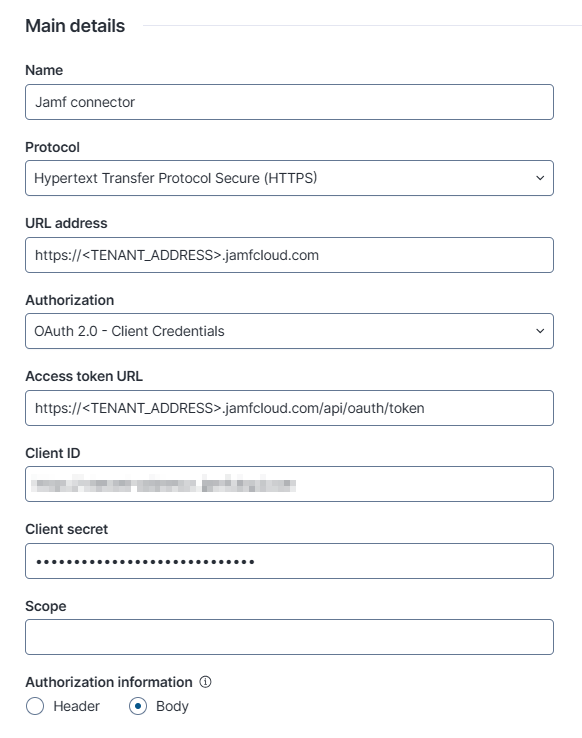
**Administration** モジュールに移動し、**Integrations** セクションから **Connector credentials** を選択します。 Jamf 用の新しいコネクタ資格情報を作成します。 詳細については、[サードパーティ認証情報](/platform/ja/configuring_nexthink/bringing-data-into-your-nexthink-instance/integrating-nexthink-with-third-party-tools/outbound-connectors/connector-credentials.md) ドキュメンテーションを参照してください。

次の入力フィールドに適切に入力し、`<TENANT_ADDRESS>` を実際の Jamf Cloud テナントアドレスに置き換えてください:

<table><thead><tr><th width="240.666748046875">入力フィールド</th><th>値</th></tr></thead><tbody><tr><td>URLアドレス</td><td><code>https://.jamfcloud.com</code></td></tr><tr><td>アクセストークンURL</td><td><code>https://.jamfcloud.com/api/oauth/token</code></td></tr><tr><td>承認情報</td><td><strong>Body</strong> に設定</td></tr></tbody></table>

<figure><img src="/files/QeCTbmjr2QSHq7WbvFqc" alt="" width="437"><figcaption></figcaption></figure>

## Jamf 用コネクタの構成: iOS モバイルデバイス

{% stepper %}
{% step %}
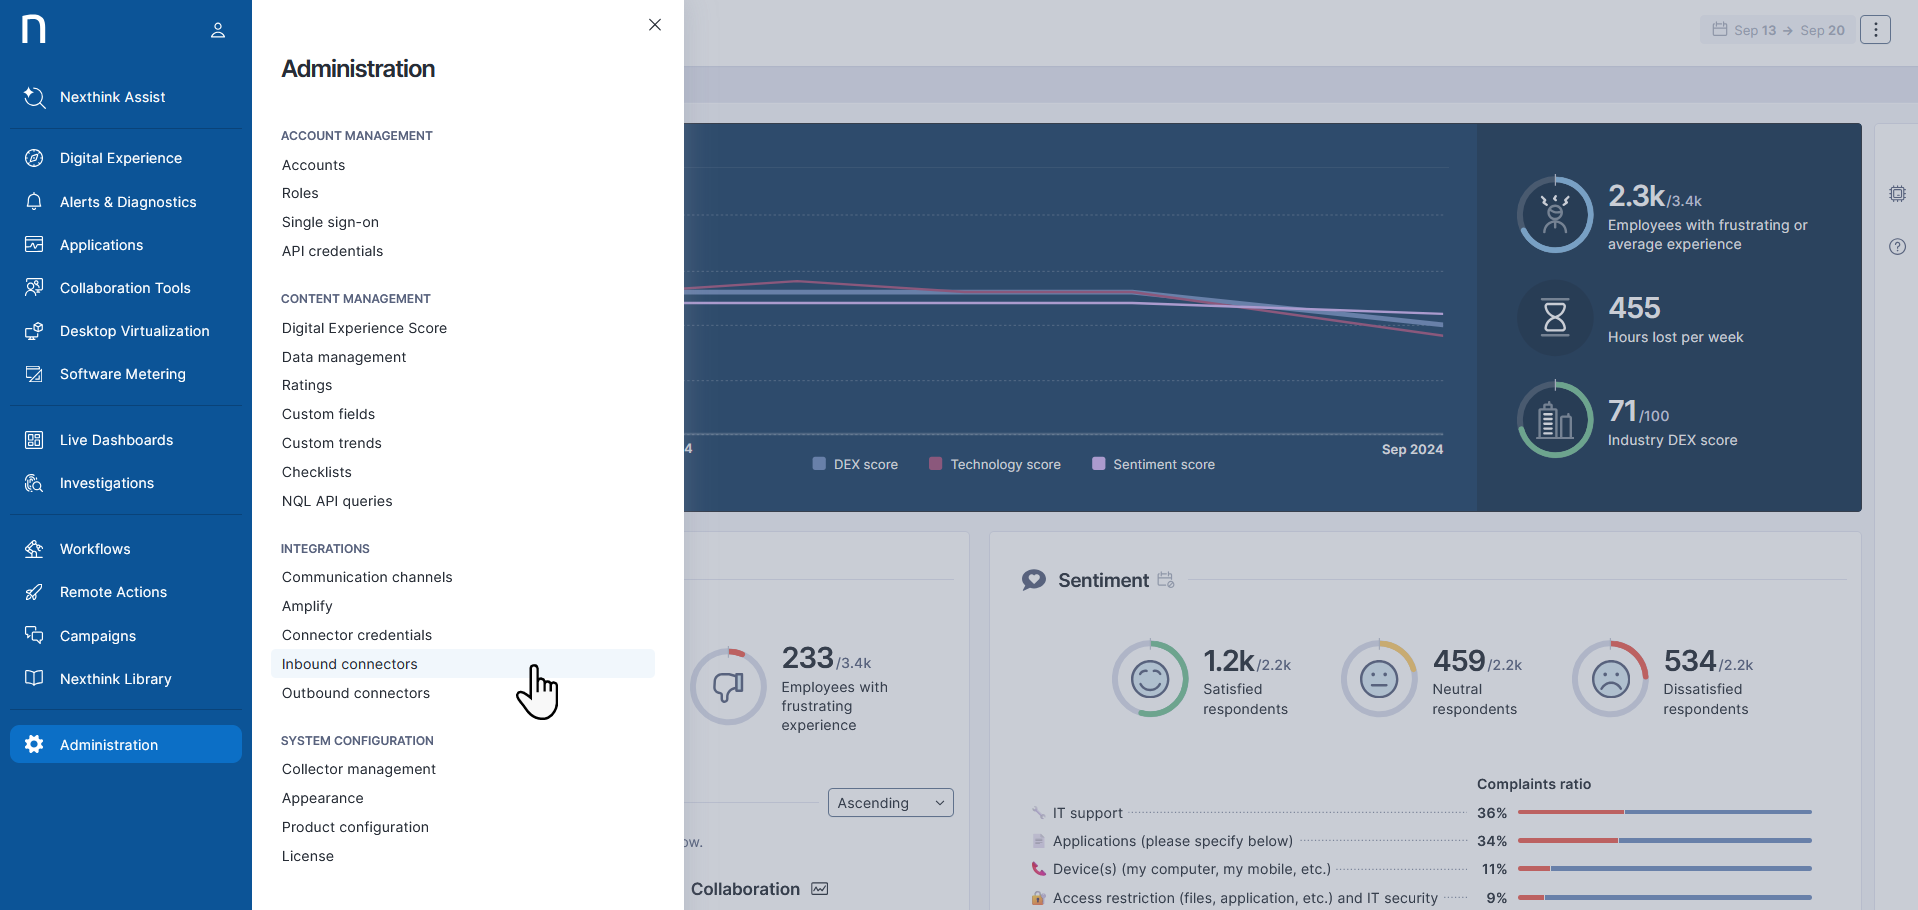
**Administration** > **Inbound connectors** に移動します。
{% endstep %}

{% step %}
ページ右上の **New connector** ボタンを選択します。
{% endstep %}

{% step %}
コネクタ一覧から **Jamf: iOS Mobile devices** を選択します。

<figure><img src="/files/5mtpGNF1sc9WtDZoknl2" alt="Creating a new inbound connector" width="563"><figcaption></figcaption></figure>
{% endstep %}

{% step %}
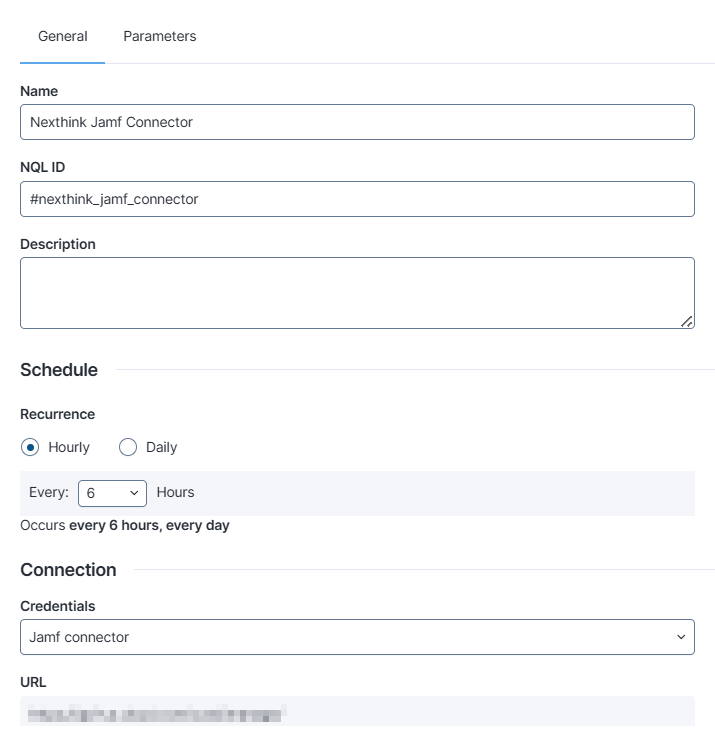
**General** タブで:

* Jamf コネクタの **名前** と **説明** を入力します。 **NQL ID** は自動生成されます。
* **Schedule** セクションで、Jamf からデータを取得する頻度を設定します。
* **Connection** セクションで、前の手順で構成した Jamf 資格情報を選択します。

<figure><img src="/files/p5v6LE80uB8KqO4gAOmZ" alt="" width="536"><figcaption></figcaption></figure>
{% endstep %}

{% step %}
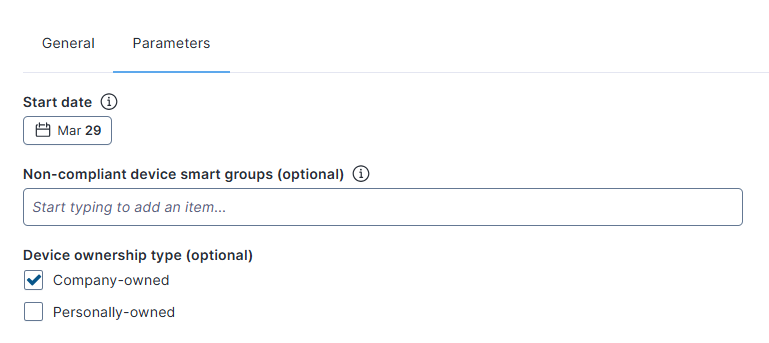
**Parameters** タブで:

* 含めるデバイスを決定するために **Start date** を選択します。 この日付以降に同期されたデバイスのみがインポートされます。
* 必要に応じて、**Non-compliant device smart groups** を選択します。 Jamf で 1 つ以上の非準拠デバイスグループを定義し、このテキストボックスにグループ名を入力します。 この入力フィールドを空のままにすると、システムは準拠情報を報告しません。
* **Device ownership type** を指定し、会社所有、個人所有、またはその両方を含めます。

<figure><img src="/files/0PC4xeivfZWiAbSr6ocF" alt="" width="563"><figcaption></figcaption></figure>
{% endstep %}

{% step %}
Jamf Cloud で **Settings > System > API roles and clients** に移動し、新しく作成した Jamf モバイルコネクタに次の権限を付与します:

* Read Mobile Devices
* Read Mobile Device Inventory Collection
  {% endstep %}
  {% endstepper %}

コネクタ設定を保存すると、システムは Jamf と即座に同期を開始し、**General** タブで定義されたスケジュールに従って同期を継続します。

## テスト結果パネル

{% hint style="info" %}
**テスト結果**パネルは、サポートされているコネクタでのみ利用可能です。 コネクタの可用性はライセンスに依存します。
{% endhint %}

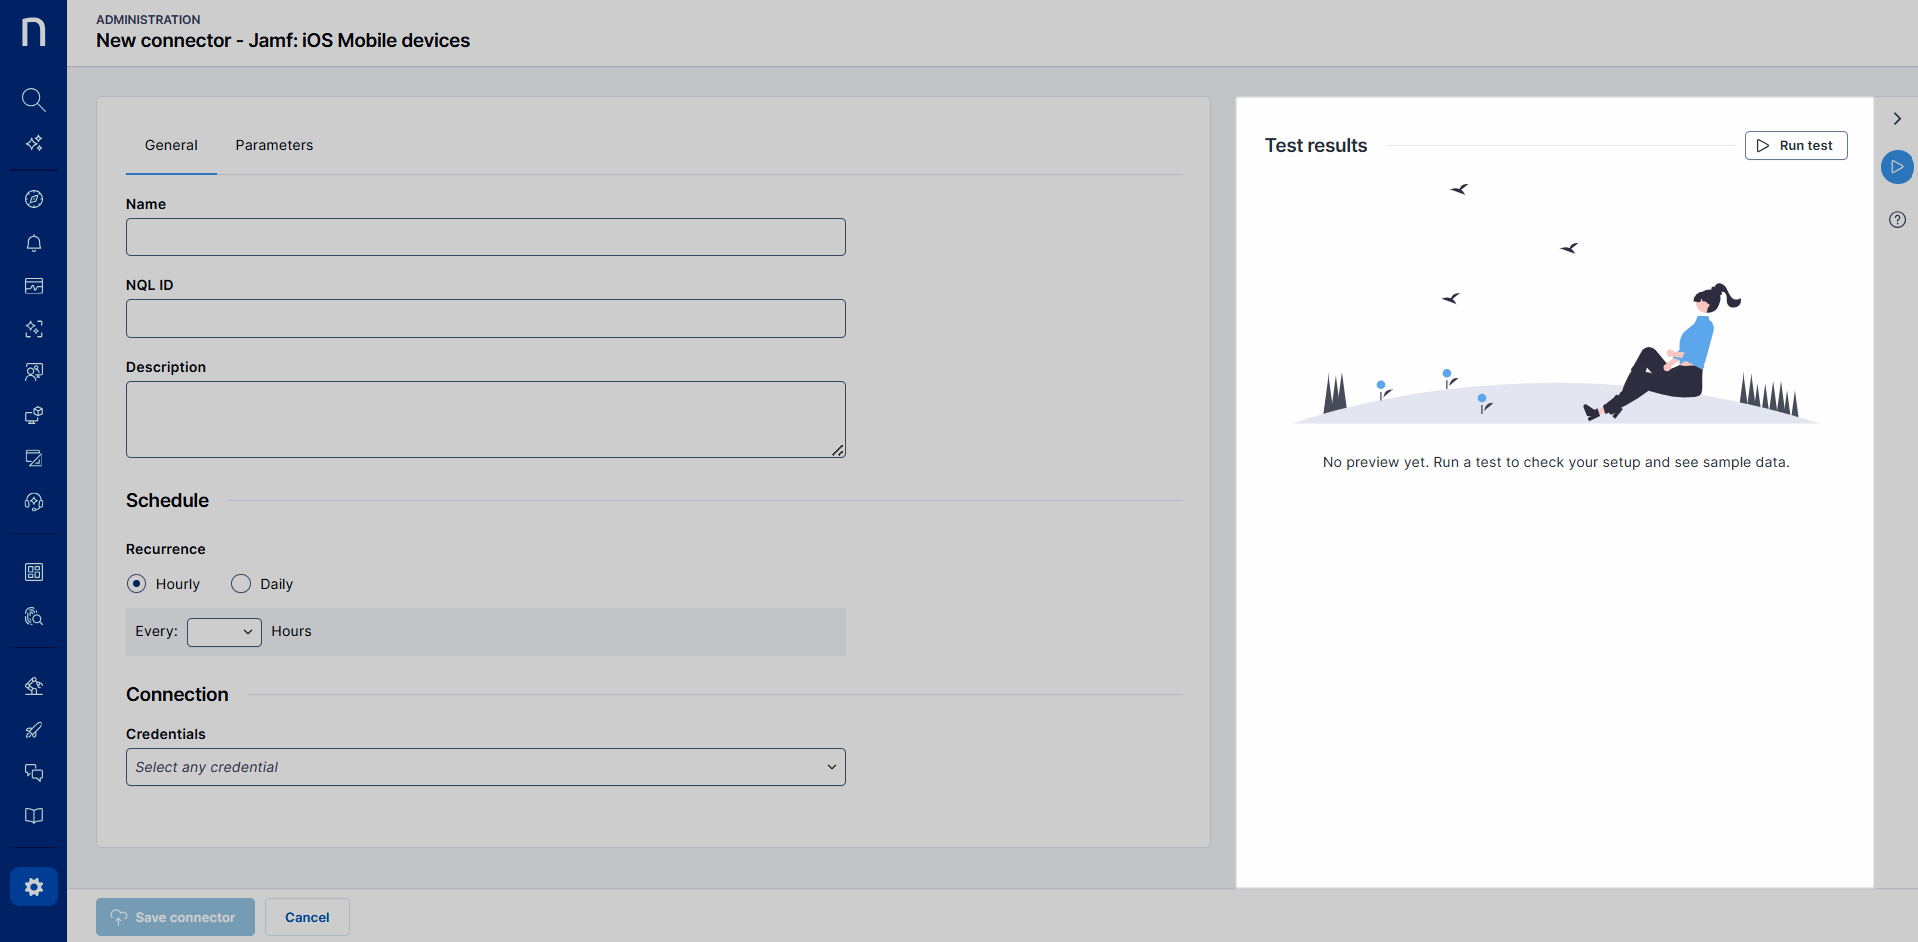
右側の **Test results** パネルを使用すると、実際のデータでコネクターをオンデマンドで実行し、レスポンスやエラーを確認できます。 テストパネルは、セットアップ時のデバッグと検証をより迅速に行うのに役立ち、試行錯誤を減らして、より信頼性の高いマッピングを実現します。

API を呼び出し、認証情報を検証し、対象エンドポイントへの接続を確認するには、**Run test** ボタンを選択します。

<figure><img src="/files/dwR5YzdLYB6NRtiIWT5y" alt=""><figcaption></figcaption></figure>

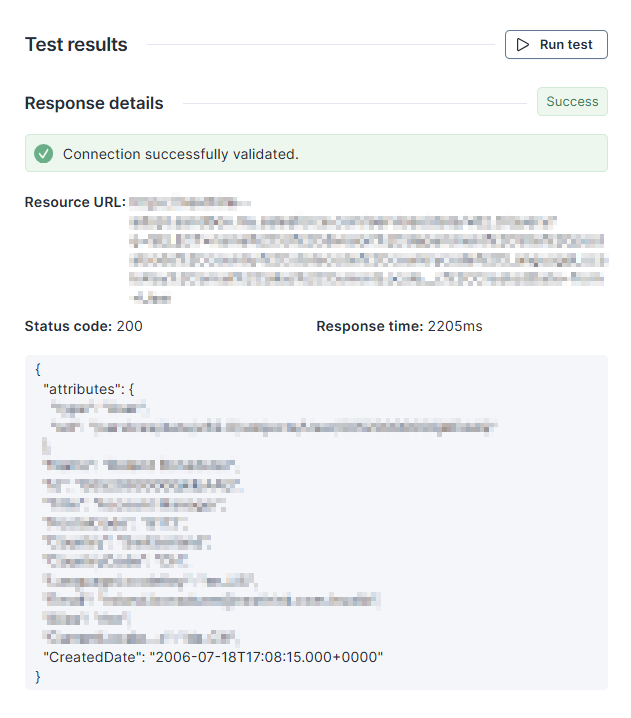
レスポンスのステータスコードや時間といった基本情報に加えて、パネルの下部にはレスポンスのサンプルレコードも表示されます。

<figure><img src="/files/HNOO9UOC8up7nND9wS3Y" alt="" width="316"><figcaption></figcaption></figure>

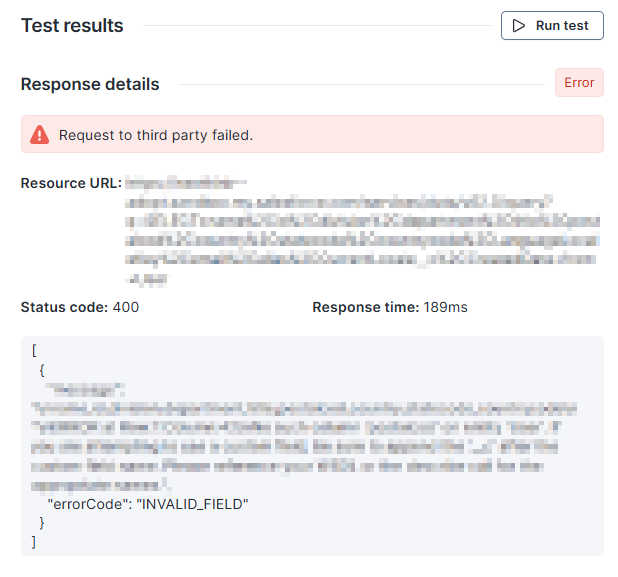
エラーが発生した場合、問題の診断に役立てるためにシステムは API のレスポンスを表示します。

<figure><img src="/files/aBnrPUlVkGJndts4wRmv" alt="" width="309"><figcaption></figcaption></figure>


---

# Agent Instructions
This documentation is published with GitBook. GitBook is the documentation platform designed so that both humans and AI agents can read, navigate, and reason over technical content effectively. Learn more at gitbook.com.

## Querying This Documentation
If you need additional information that is not directly available in this page, you can query the documentation dynamically by asking a question.

Perform an HTTP GET request on the current page URL with the `ask` query parameter, and the optional `goal` query parameter:

```
GET https://docs.nexthink.com/platform/ja/configuring_nexthink/bringing-data-into-your-nexthink-instance/integrating-nexthink-with-third-party-tools/inbound-connectors/jamf-ios-mobile-devices-connector.md?ask=<question>&goal=<endgoal>
```

`ask` is the immediate question: it should be specific, self-contained, and written in natural language.
`goal` is optional and describes the broader end goal you are ultimately trying to accomplish on behalf of the user. GitBook uses it to tailor the answer towards what is most useful for that goal.

The response will contain a direct answer to the question and relevant excerpts and sources from the documentation.

Use this mechanism when the answer is not explicitly present in the current page, you need clarification or additional context, or you want to retrieve related documentation sections.