> For the complete documentation index, see [llms.txt](https://docs.nexthink.com/platform/llms.txt). Markdown versions of documentation pages are available by appending `.md` to page URLs; this page is available as [Markdown](https://docs.nexthink.com/platform/ja/configuring_nexthink/bringing-data-into-your-nexthink-instance/deploying-nexthink-in-non-vdi-environment/configure-amplify/installation-and-configuration/setting-up-amplify-as-a-standalone-window.md).
# 独立したウィンドウとして Amplify を設定する
ブラウザからAmplify拡張機能にアクセスする代わりに、それを単独アプリケーションとして設定できます。
### Google Chrome
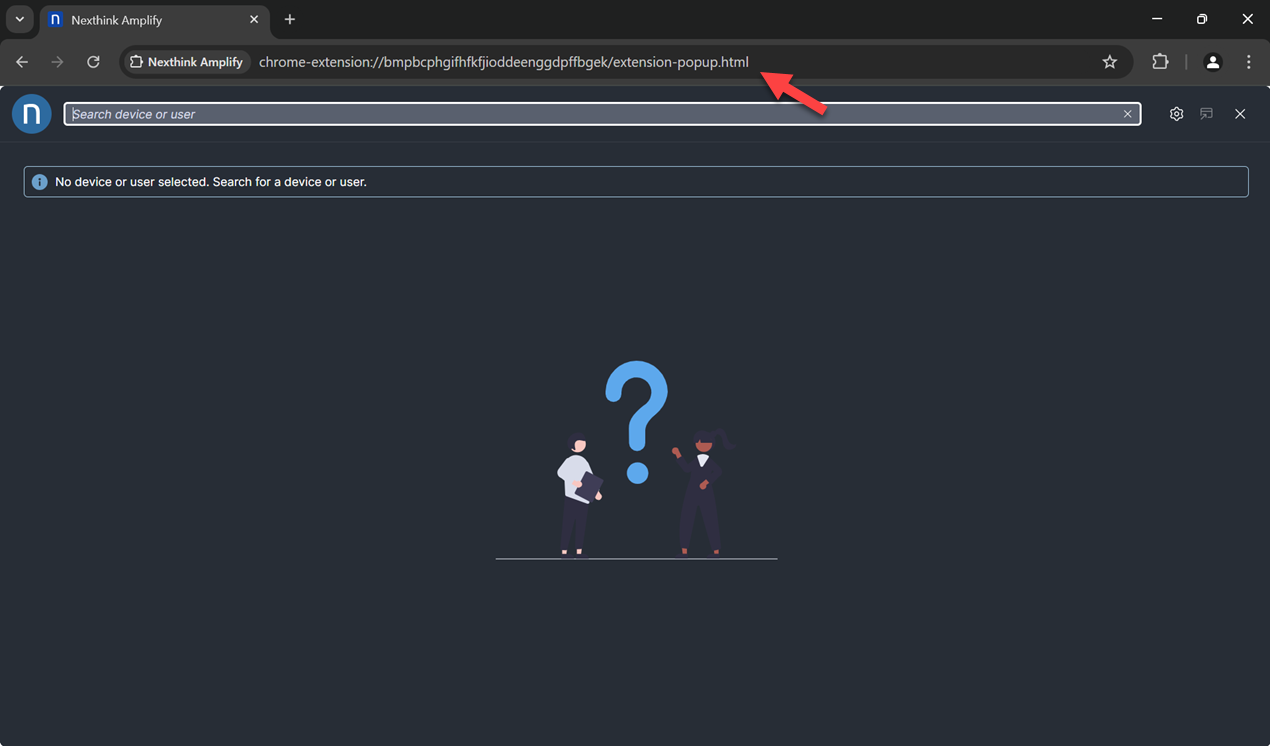
1. 次のURLでAmplifyウィンドウに直接アクセスします: `chrome-extension://bmpbcphgifhfkfjioddeenggdpffbgek/extension-popup.html`。
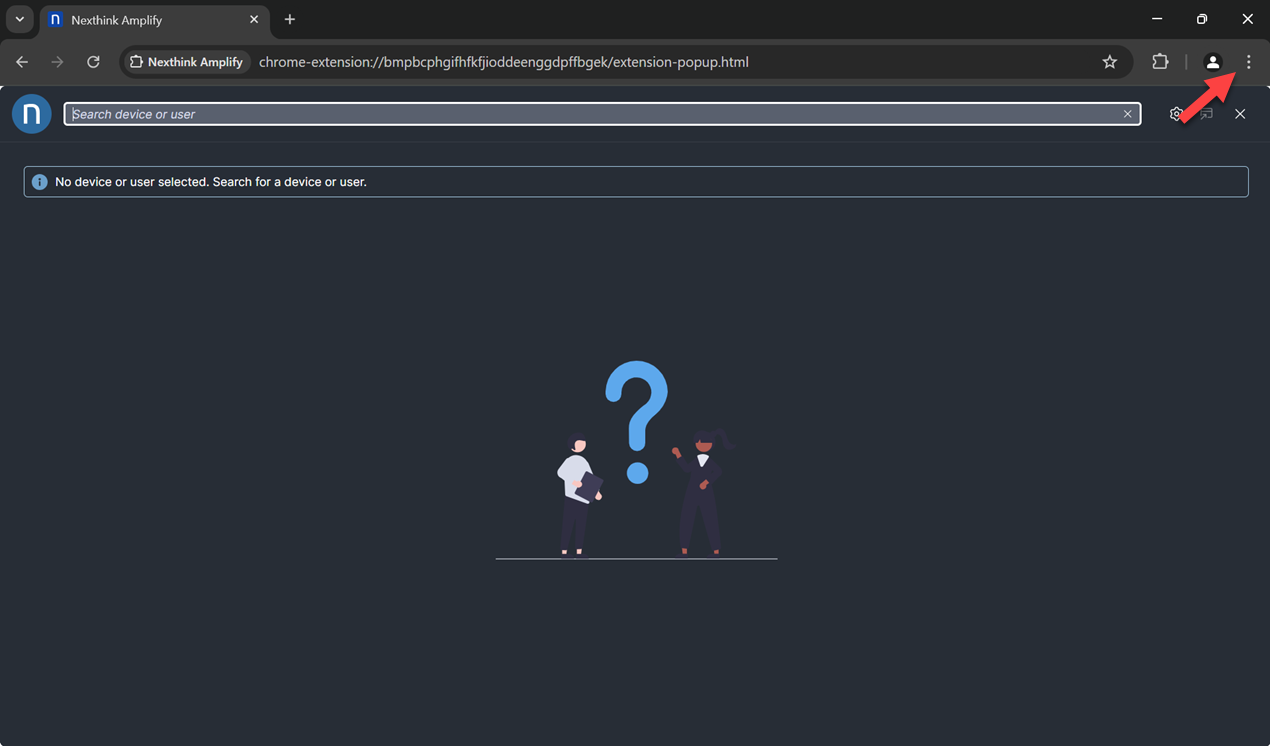
2. 右上隅にある`Google Chromeをカスタマイズして制御する`メニューを見つけます。
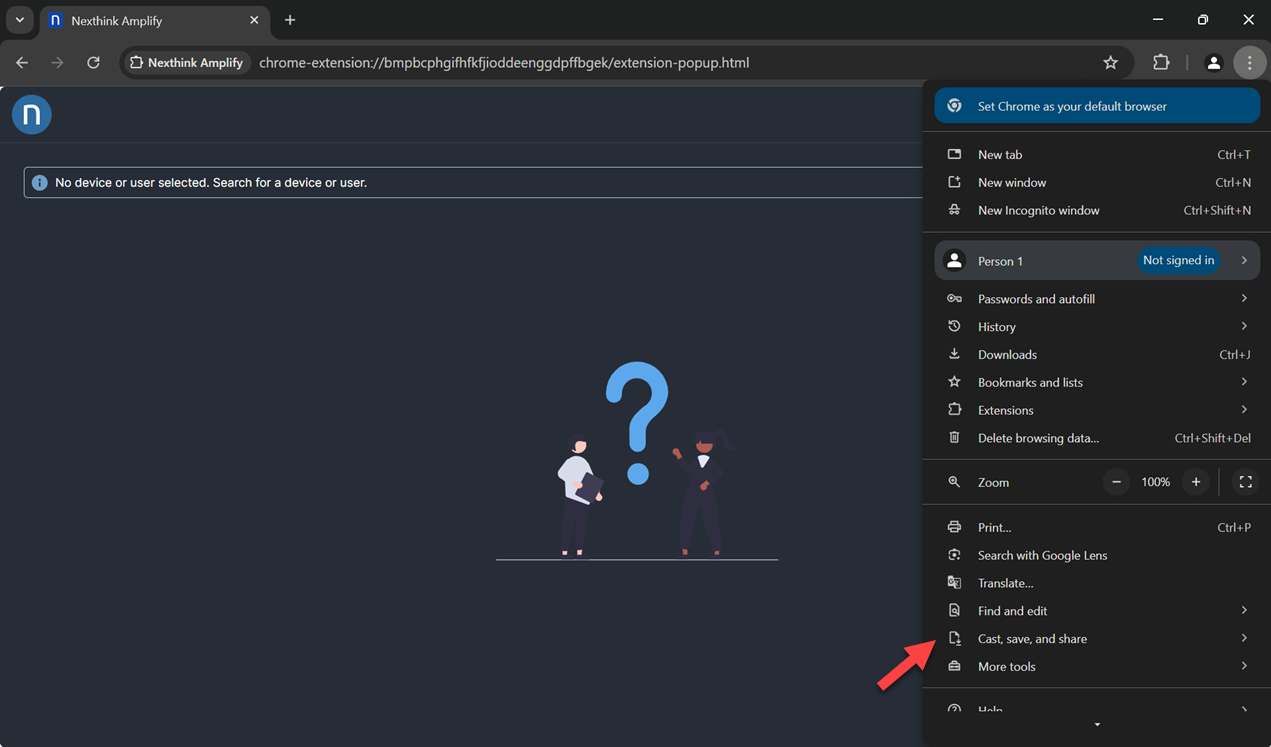
3. `キャスト、保存、共有`を選択します。
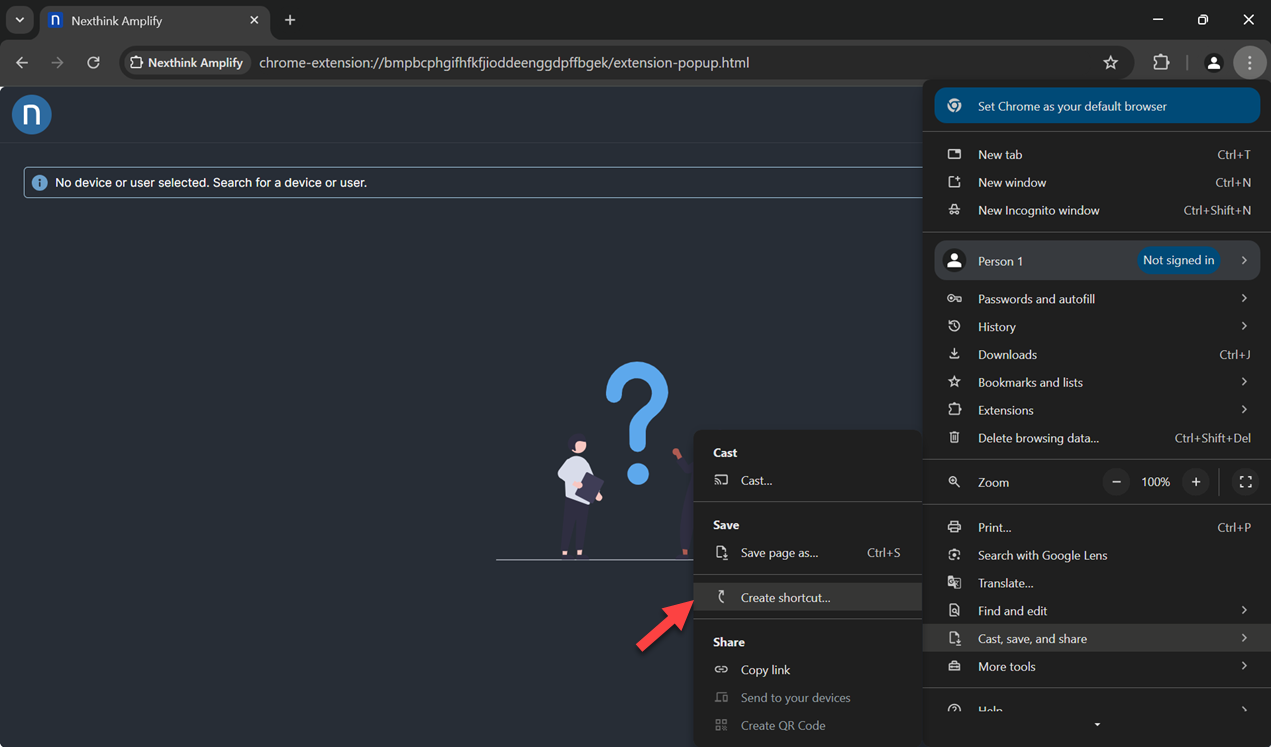
4. `ショートカットを作成`を選択します。
4. 必要に応じてショートカットの名前を変更します。
5. `作成`を押します。
### Microsoft Edge
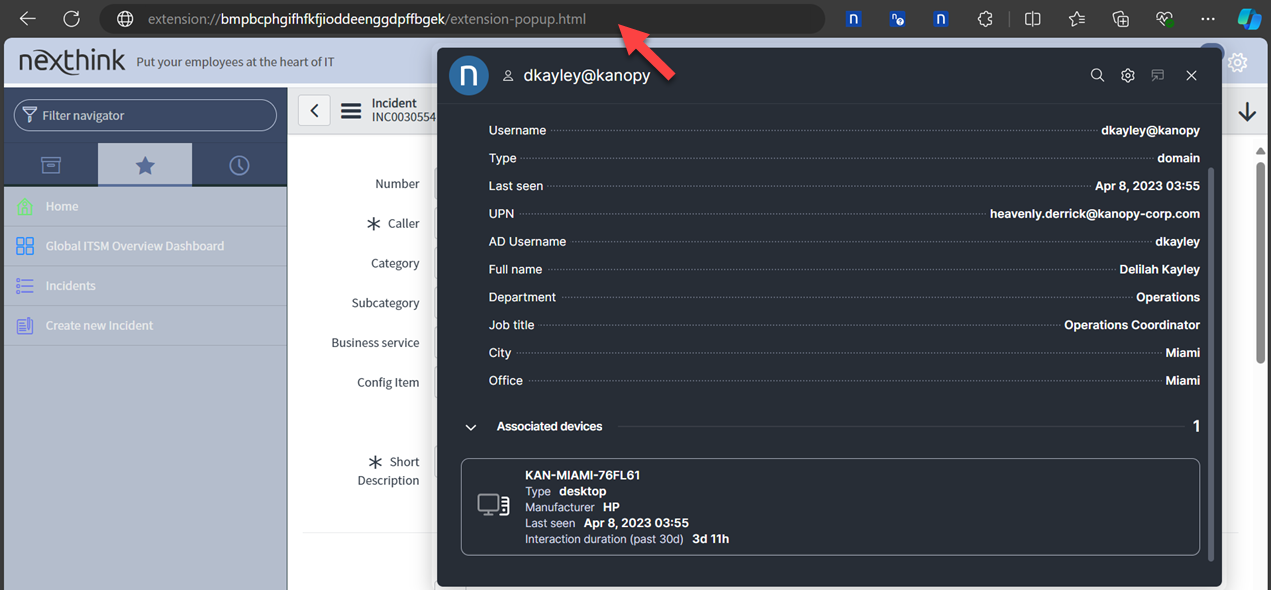
1. インストールした拡張機能に対応する URL を使用して、Amplify ウィンドウに直接アクセスします:
* Microsoft Edge Add-ons ストアから Amplify をインストールした場合は、次を使用します。\
`extension://kcidkikoejfejnfmbmhmfkncdlopflhe/extension-popup.html`
* Chrome ウェブストアから Microsoft Edge に Amplify をインストールした場合は、次を使用します。\
`extension://bmpbcphgifhfkfjioddeenggdpffbgek/extension-popup.html`
**注:** Nexthink では、Microsoft Edge Add-ons ストアから専用の Microsoft Edge 拡張機能を使用することを推奨しています。
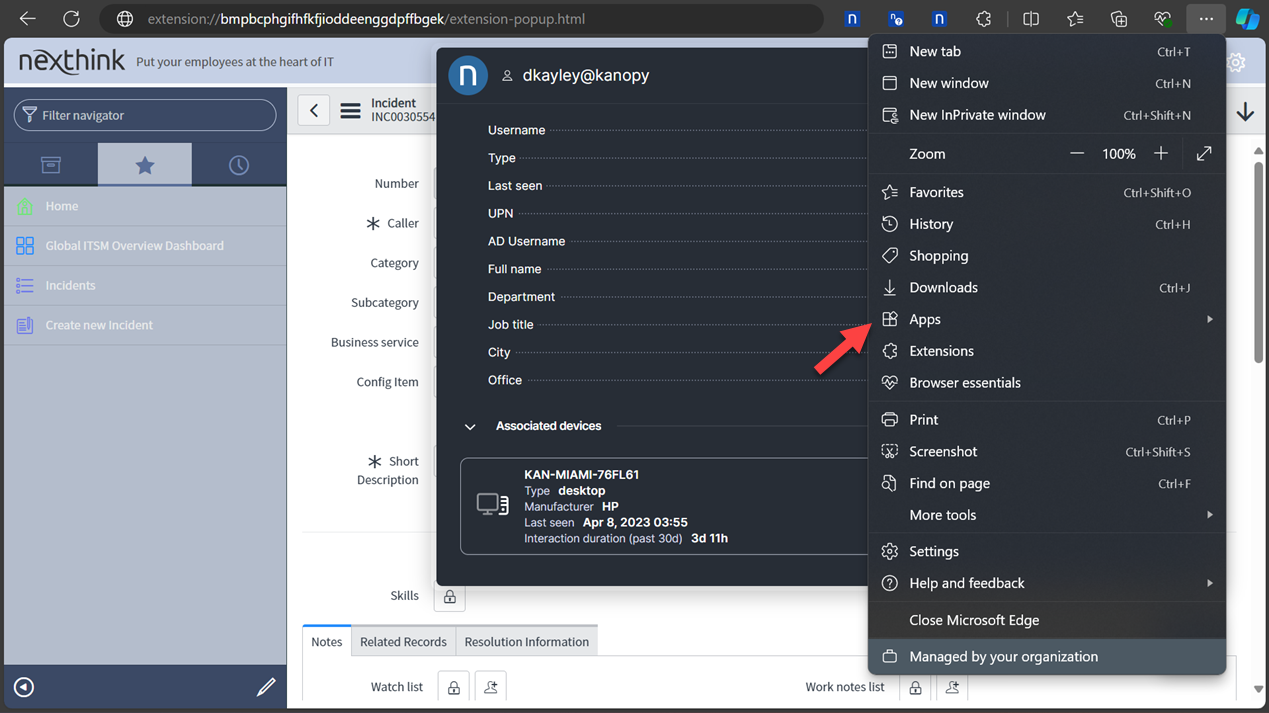
2. 右上隅にある`設定とその他`メニューを見つけます。
3. `アプリ`を選択します。
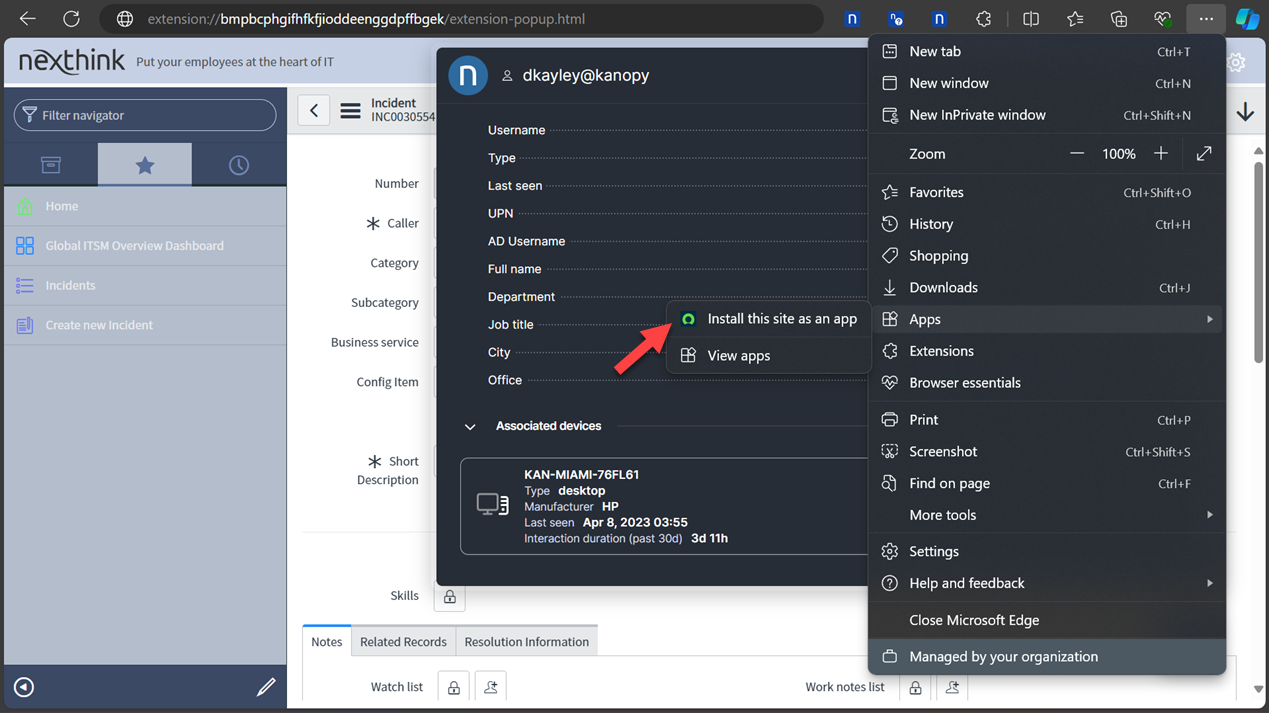
4. `このサイトをアプリとしてインストール`を選択します。
5. 必要に応じてアプリケーションの名前を変更します。
6. `インストール`を押します。
---
# Agent Instructions
This documentation is published with GitBook. GitBook is the documentation platform designed so that both humans and AI agents can read, navigate, and reason over technical content effectively. Learn more at gitbook.com.
## Querying This Documentation
If you need additional information that is not directly available in this page, you can query the documentation dynamically by asking a question.
Perform an HTTP GET request on the current page URL with the `ask` query parameter, and the optional `goal` query parameter:
```
GET https://docs.nexthink.com/platform/ja/configuring_nexthink/bringing-data-into-your-nexthink-instance/deploying-nexthink-in-non-vdi-environment/configure-amplify/installation-and-configuration/setting-up-amplify-as-a-standalone-window.md?ask=&goal=
```
`ask` is the immediate question: it should be specific, self-contained, and written in natural language.
`goal` is optional and describes the broader end goal you are ultimately trying to accomplish on behalf of the user. GitBook uses it to tailor the answer towards what is most useful for that goal.
The response will contain a direct answer to the question and relevant excerpts and sources from the documentation.
Use this mechanism when the answer is not explicitly present in the current page, you need clarification or additional context, or you want to retrieve related documentation sections.