Deploying on Android devices
This guide explains how to deploy the Nexthink Mobile app for Android devices in Intune. It is intended for IT administrators responsible for device management and Nexthink onboarding, and it assumes familiarity with Android device management concepts and with administering Intune.
Before you begin
Create an installation token as described in the Creating an installation token documentation.
Adding Nexthink Mobile
Perform the following steps to add Nexthink Mobile to Intune.
Select Apps > Android > Create.
For Category, select Store app; then Managed Google Play app:

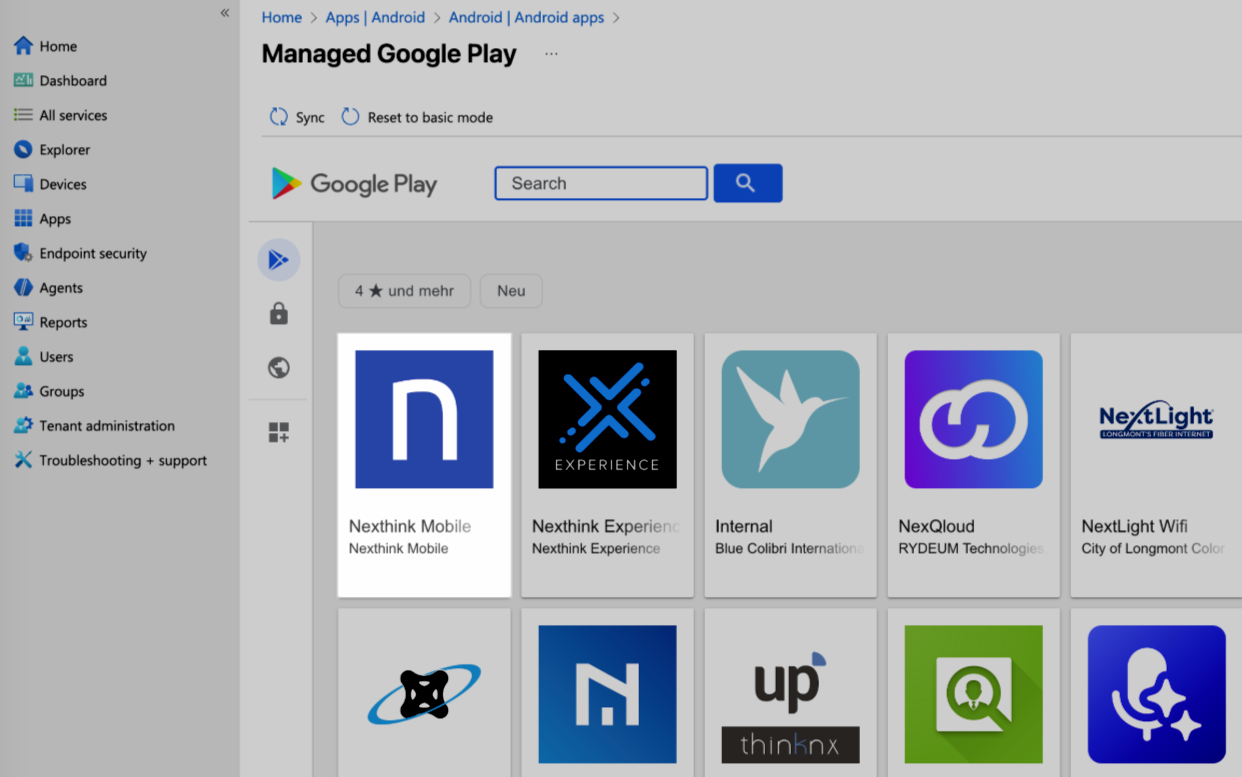
In Google Play, go to the Search Play Store dashboard.
Search for the keyword "Nexthink Mobile" and install the app from the search result:

Creating an app configuration policy
Create an app configuration policy and assign it to your Entra ID groups by following the steps below.
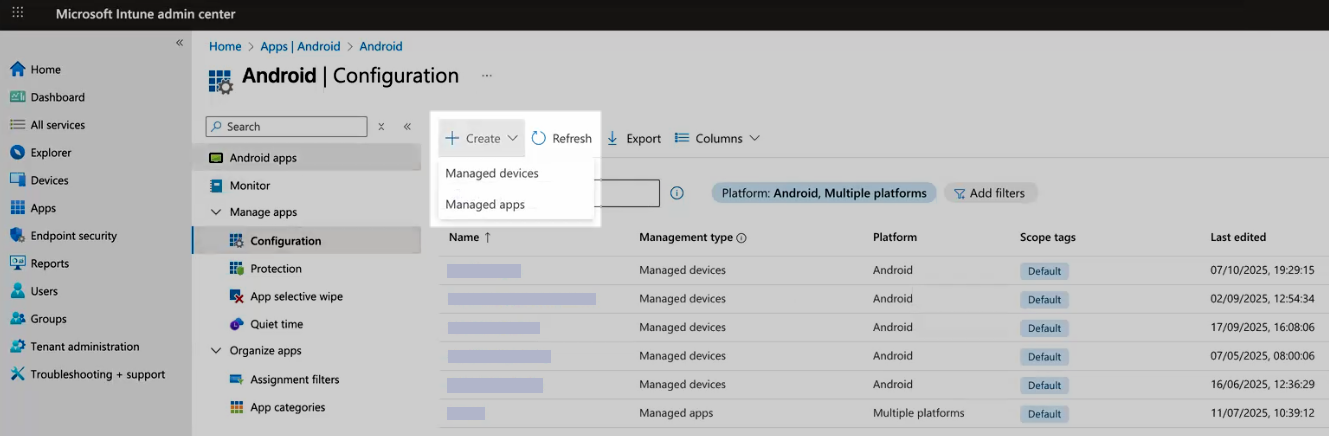
Go to Apps > Manage apps > Configuration.
Select Create > Managed devices:

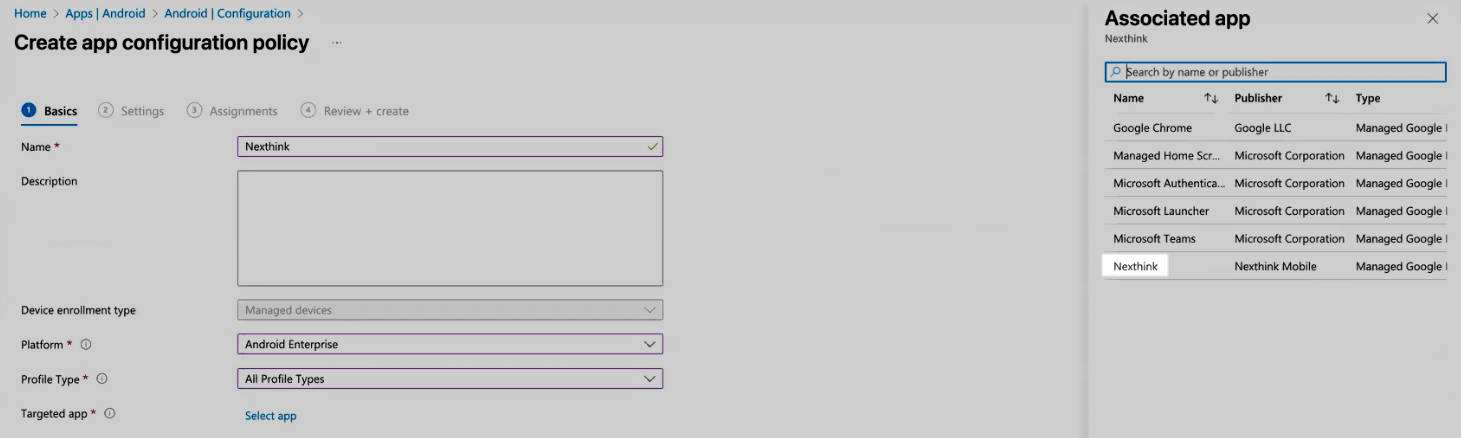
On the Create app configuration policy dashboard, fill in the following fields:
Name: Add a meaningful name for your policy.
Platform: Select Android Enterprise.
Profile type: Select the profile that is applicable to your organization.
Select Targeted app and select the previously created app from the list and proceed to Settings:

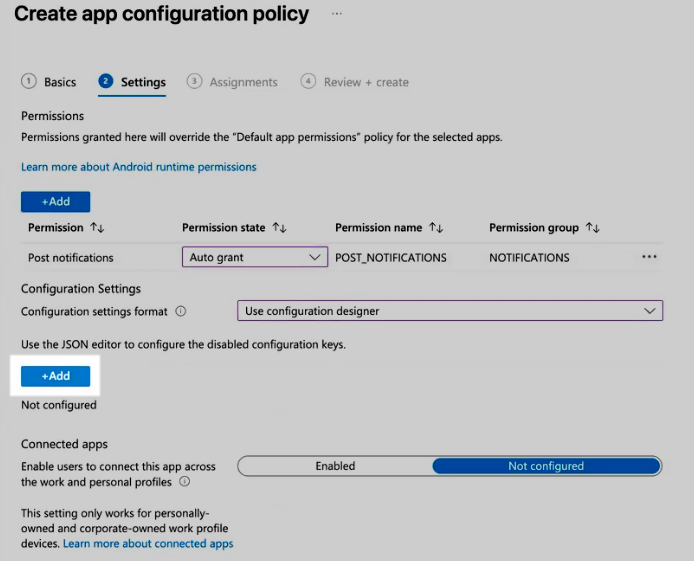
Select +Add and enable the Post notification permission; select Auto grant to allow Nexthink Mobile to send notifications, or Auto deny to prevent it:

In Configurations settings format, select Use configuration designer from the dropdown and select the lower +Add button:

Select the following configuration keys, and set the pertaining value types and configuration values:
Data Upload Network
choice
Choose one of the following options:
Upload Always: Includes Wi-Fi and mobile data
Upload only when not roaming: Includes Wi-Fi and mobile data
Upload only over wifi: Wi-Fi only
Collect Network Identifiers
bool
Select to collect the SSID and BSSID from the connecting network.
Force Show Settings Screen
bool
Select the checkbox.
Nexthink Installation Token
string
The installation token you generated for your Nexthink tenant.
Nexthink Proxy URL
string
The URL of your Nexthink tenant, according to the following pattern:
https://<instance>.data.<region>.nexthink.cloudExample:
https://instance.data.eu.nexthink.cloud
Primary user UPN
variable
Select User principal name (UPN) in the Configuration value dropdown list.
Support email address
string
Define the email address to which Nexthink Mobile sends logs. When sending logs, the app opens the email app, and sets the defined email address as recipient.
Unique Device Identifier
variable
Select Intune Device ID in the Configuration value dropdown list.
⚠️ This is needed to ensure correct functionality with the connector.
Select Add groups and add the groups to which you want to assign the policy, then select Create to finalize the app.
Installing Nexthink Mobile on client devices
After creating an app configuration policy, you can define which device groups install Nexthink Mobile automatically and which ones must install it manually:
Fully company-managed devices can automatically install Nexthink Mobile through the UEM solution.
Bring your own devices (BYOD) must have a work profile on them and install Nexthink Mobile manually from the app store.
First, select Nexthink Mobile by following the steps below.
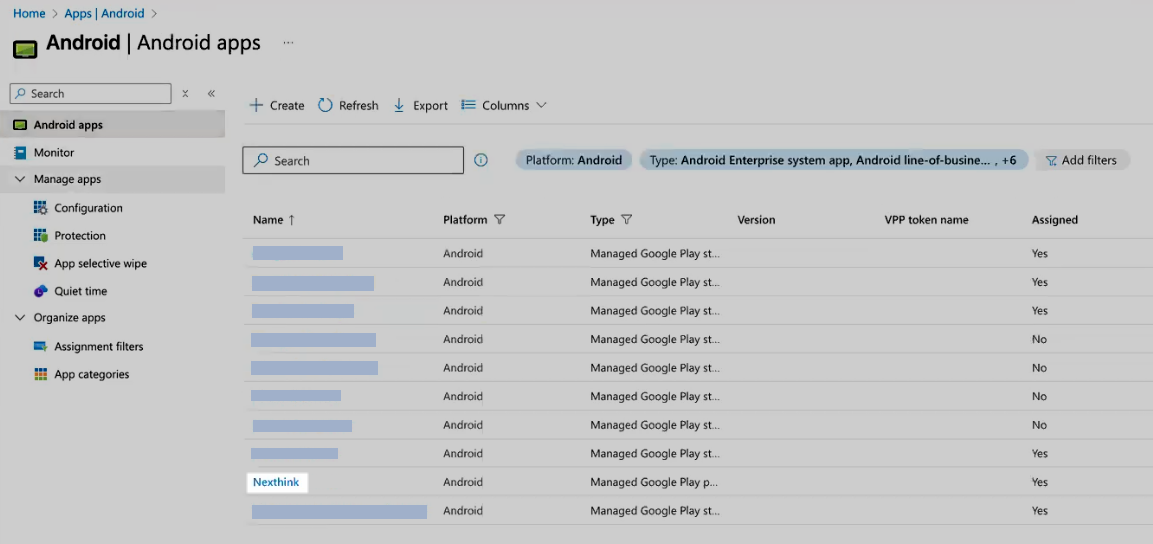
Select the app from the list of Android apps:

Select Properties, then Assignments > Edit.
Proceed with Automatic installation or Manual installation based on the specific device types.
Automatic installation
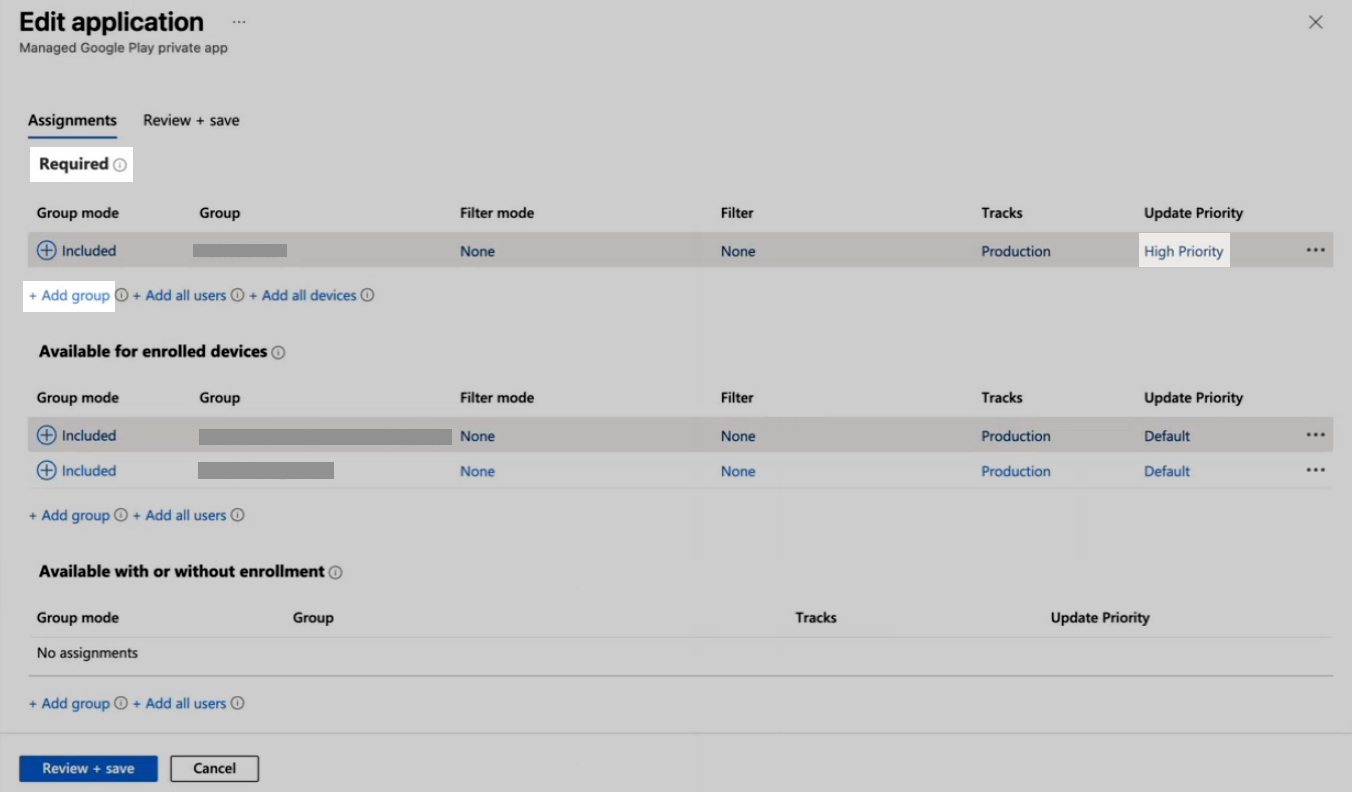
Select + Add group under Required, and set the Update priority to High priority:

Device groups in this category will install Nexthink Mobile automatically the next time Intune syncs with the devices.
Manual installation
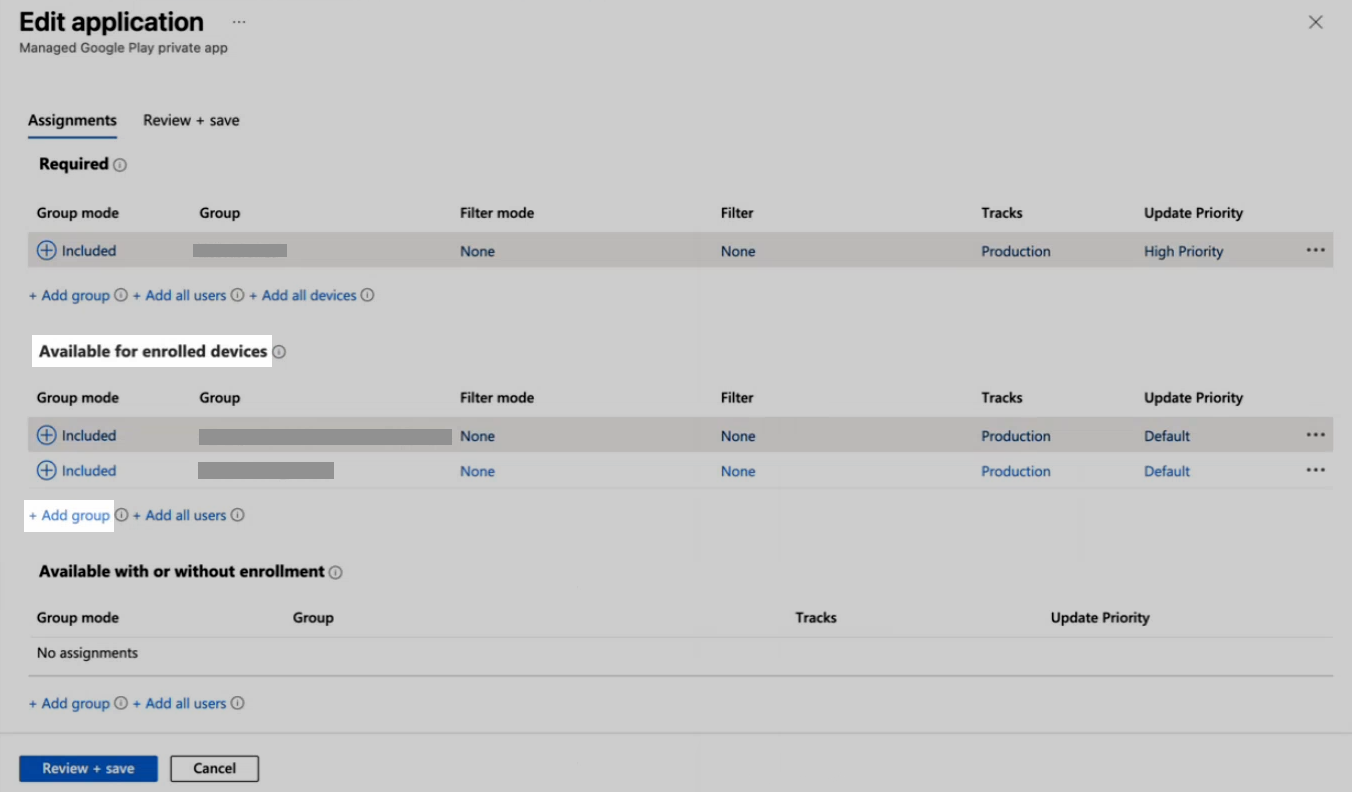
Select + Add group under Available for enrolled devices:

At this point, Nexthink Mobile will be available in your organization's company portal, from where users can install it directly on their client mobile devices.
Launching Nexthink Mobile automatically
By default, after the installation, the mobile device user must open Nexthink Mobile manually for the first time. This only has to be done once; after that, the app will automatically launch following each device reboot.
However, depending on the device manufacturer, you might use an OEM plugin, configured in Intune, to launch it automatically on user devices after installation. The following sections explain such use cases.
Samsung Knox Service Plugin
Prerequisites
Add the Samsung Knox Service Plugin to your organization’s app collection.
Deploy and install the plugin on the target Samsung mobile devices.
Configuring the plugin
In Intune, go to Devices > Managed devices > Configuration.
Select Create profile, add the following values and select Create:
Platform: Android Enterprise
Profile type: Templates
Template name: OEMConfig
Add a meaningful name for the profile, then click Select an OEMConfig app and select the Knox Service Plugin app.
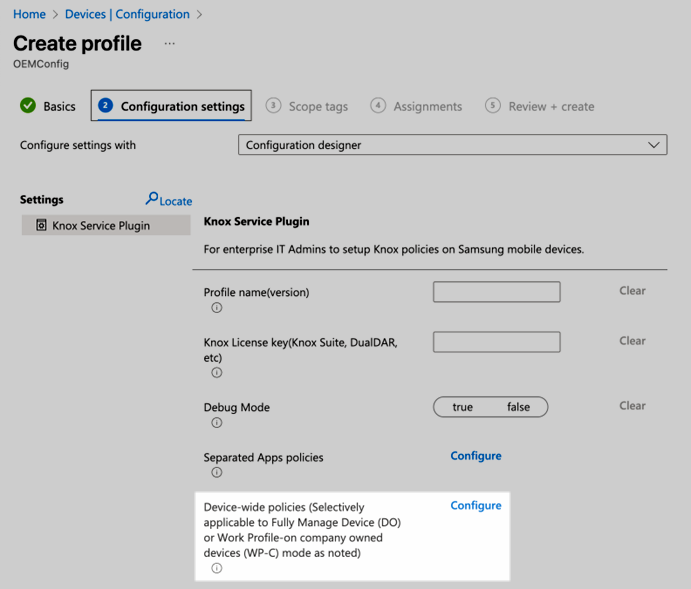
Select the Knox Service Plugin profile type and configure a Device-wide policy:

Configure the following settings:
Enable device policy controls: Set to true.
Application management policies: Select Configure and configure the following policies:
Enable application management controls: Set to true.
Battery optimization allowlist: Add the following Nexthink Mobile package name:
com.nexthink.mobile.nexthinkapp
Package Name for Auto-Launch: Add the following Nexthink Mobile package name:
com.nexthink.mobile.nexthinkapp
Enable permission controls: Set to true.
You do not need to define Scope tags; proceed to Assignments, and select + Add groups to define which device groups will be part of the policy.
Zebra OEM Plugin
Prerequisites
Add the Zebra OEMConfig Powered by MX to your organization’s app collection.
Deploy and install the plugin on the target Samsung mobile devices.
Configuring the plugin
In Intune, go to Devices > Managed devices > Configuration.
Select Create profile, add the following values and select Create:
Platform: Android Enterprise
Profile type: Templates
Template name: OEMConfig
Add a meaningful name for the profile, then click Select an OEMConfig app and select the Zebra OEMConfig Powered by MX app.
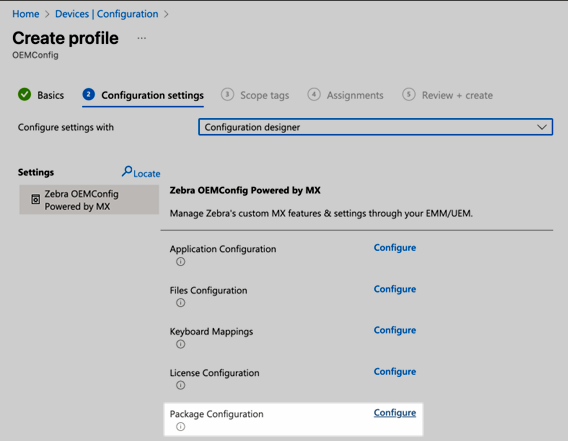
Select the Zebra OEMConfig Powered by MX profile type and open the Package Configuration:

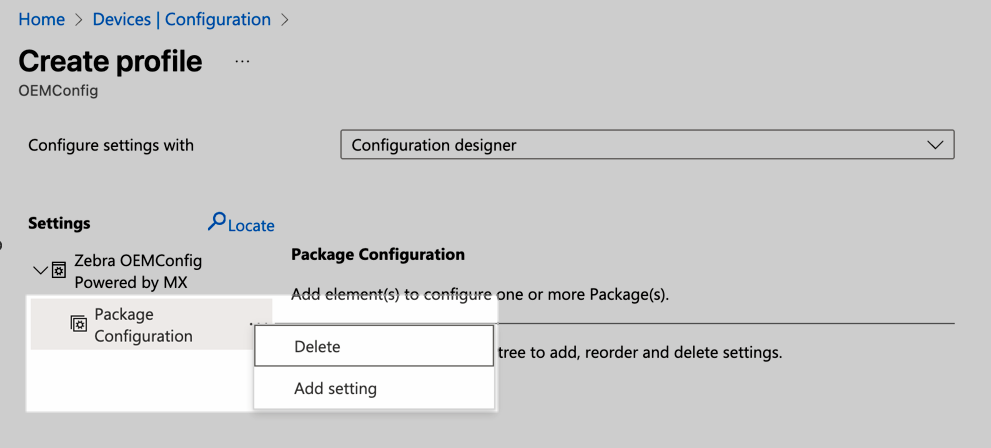
Add a new setting:

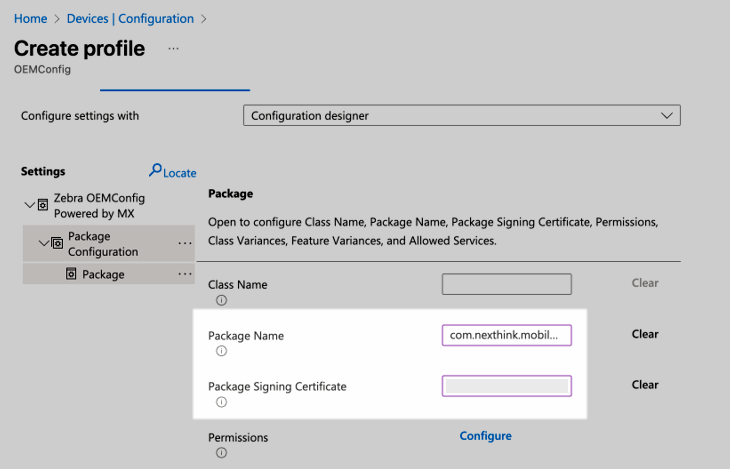
Add the Nexthink Mobile package name com.nexthink.mobile.nexthinkapp, and app signature:

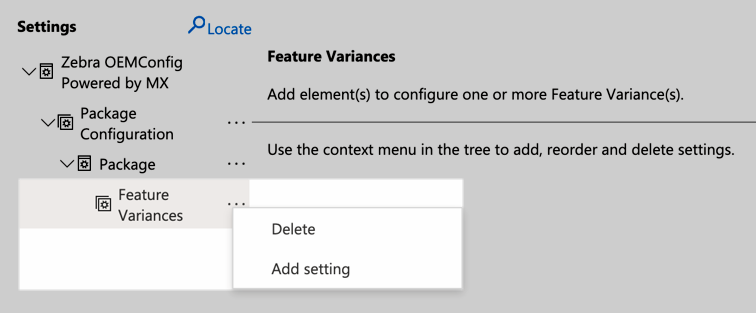
Select Feature Variances and add a new feature variance:

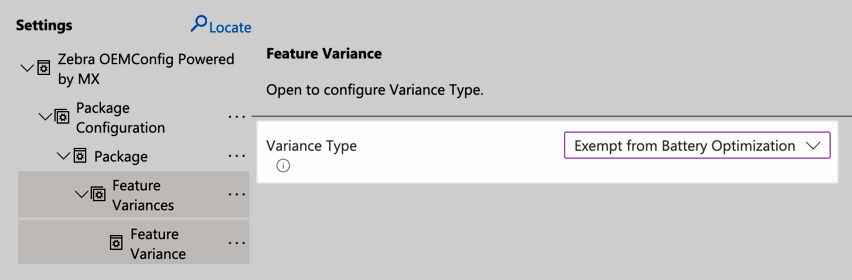
Add a new setting and select the Exempt from Battery Optimization variance type:

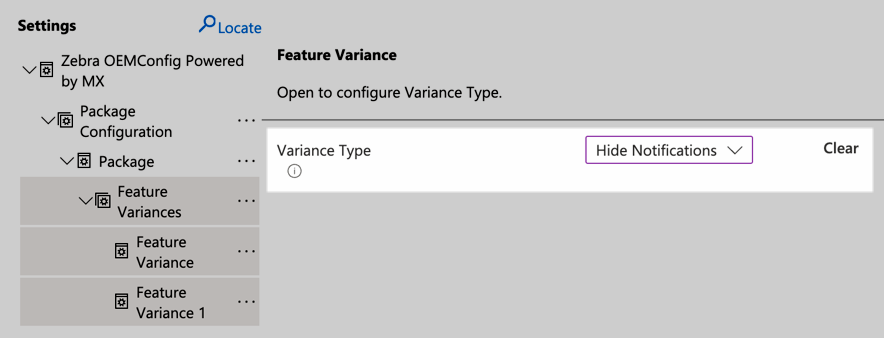
To make sure the Nexthink Notification is not shown on Zebra devices to users, add a new feature variance and select the Hide Notification variance type.

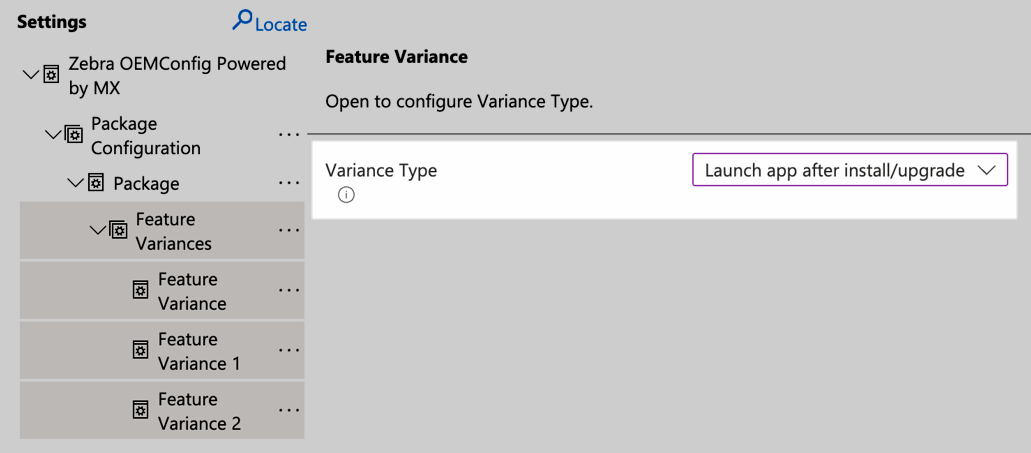
To enable auto-launch for Nexthink Mobile, add a new feature variance and select the Launch app after install/upgrade variance type.

Certificate signature
When asked for a certificate signature for Nexthink Mobile, provide the value shown in the expandable section below.
Configuring Nexthink Mobile on client devices (optional)
If needed, see the Configuring Nexthink Mobile on user devices documentation to learn how to configure Nexthink Mobile on client devices.
Last updated
Was this helpful?